Tuesday, October 18, 2016

Windsor High Chair Plans From Curtis Buchanan Available


Dave Sawyer Windsor High Chair
Photo by Joshua Klein of Mortise & Tenon Magazine

Thought you all might like to hear that Curtis Buchanan has released his Windsor highchair plans. This chair seems to capture the affection of every Windsor chairmaker I know. Honestly many of them use it as a high stool for setting in. It's just perfect for squeezing into. Almost like a high perch when you don't really feel like lounging. A place to set when you feel alert and want your mind to actively wonder and plan your next project. I think I'm talking myself into making one of these for my own personal use. Anyhow now I have no excuse not to.


If you want to know more, hop over to curtisbuchananchairmaker.com and check them out. Also Mortise & Tenon magazine will be featuring an article on Dave Sawyer who made the high chair in the opening picture. Dave was a huge influence on the windsor chair world. His designs and mentoring were felt by makers like Curtis and Peter Galbert. If you have Pete's Chairmakers Note Book then you'll note the drawing of Dave's high chair in the introduction (page xiii). He's a big fan.

Whatever you're doing in the shop today have fun and stay safe!

Tuesday, July 5, 2016

Try A Traditional Spokeshave At Lie-Nielsens 35th Anniversary Open House!


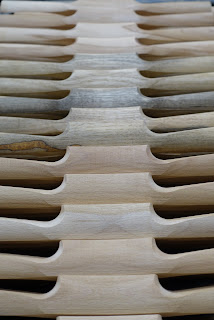
I'll be Attending the Lie-Nielsen 35th Anniversary Open House in Warren, ME the 8th and 9th of July. If you'd like to try out one of my traditional wooden bodied spokeshaves they will be there along with a verity of woods to choose from. As noted in the picture above the woods are (from top to bottom) beech, apple, pear and persimmon. Also, I have spokeshaves back in stock for a limited time. You can see them in my online shop here.


I had to share this little fella I discovered in the shavings pile. I don't think I could reproduce this in a hundred years. Might just get mounted in a shadow box. :) Have a great day in the shop!


What a drawknife can do


Monday, June 6, 2016

Danish Modern Lounge Chairmaking Classes - Learn to Weave Danish Cord


I've recently completed a Danish modern style lounge chair that is perfect for the serious student of the craft. If you ever wanted to learn how to weave Hans Wegner's CH25 then this is the chair for you. It is a foldable chair so when the class is through you can easily pack it home.


The design of this chair is inspired after the Hans Wegner 512 folding chair but it has been simplified in style similar to Morten Gøttler's Cuba chair. I then adjusted the chair's framing to accommodate the "planflet" weave pattern. Needless to say its a surprisingly comfortable chair. I know you will enjoy making and using this piece for many years to come.


What will the class entail? It will be a 5 day, one-on-one course (Mon-Fri). The components, including hardware, will be pre-made for you. You will spend the first two days removing milling marks from the parts and creating a finish ready surface. Then you assemble the frame and put on a traditional Danish finish. Starting day three you will begin the weaving process.

The total cost for the class is $1850 which includes materials. Please contact me for scheduling a class.


Friday, June 3, 2016

Taking Traditional Spokeshave Pre-Orders - Plus User Reviews!


Hello All! I'm currently working on a large batch of my traditional spokeshaves. I've had lots of great feedback on these shaves so I'm happy to be offering them again so soon.

Here's what Peter Galbert has to say about the spokeshave and a quick video clip here on Instagram.

Another review from Austrian chairmaker Bern Chandley with a video clip here on Instagram.

If you'd like to learn more or place an order click here to go to my shop. I've got some in apple, pear, persimmon, and of course beech.

traditional wooden spokeshave spoke shave

See the use and care instructions for the shave in the next post and here is a quick video showing what makes this shave different than their moderns spokeshave relatives. (I've posted this previously.) This is no ordinary "wooden spokeshave kit" kinda tool. 


Enjoy and Thank You to everyone for your continued support of small independent craftsman!


Thursday, March 17, 2016

Traditional Wooden Spokeshave Use & Care Instructions


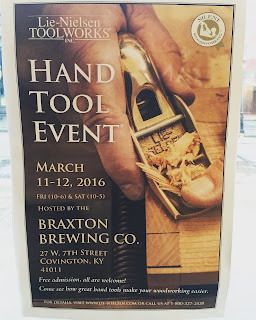
I've had a great initial production run on the new traditional spokeshave. I'm nearly sold out at the moment, with the last 2 now available in my shop. It's been fantastic showing this tool off and the feedback has been encouraging. I recently had the pleasure of demonstrating this tool and putting it into the hands of many people at the Lie-Nielsen Hand Tool Event at the Braxton Brewery in Covington, KY. It was a blast! You know what I mean if you were there. Hope they put it on again next year.


I wanted to give you a good view of the final shave after all the prototype versions I have shown here and on Instagram. I made some in boxwood, pear, persimmon and, of course, beech. 


All the shaves have a persimmon (ebony) wear strip inserted into the sole for high wear properties. I have been so pleased with this aspect of the tool and the feedback that this all wood sole gives. It has been great fun getting these into peoples' hands and seeing their eyes light up when they realize how different a traditional shave is in use. Hope to get more chances to do this. Next time will probably be at Woodworking in America 2016.  


This shave is being produced in the manner that the original shaves were made in the 19th century. All of its initial shaping is produced by machinery. Below is one step of many in the process. All the final fitting and finishing is done by hand.


Because of the feedback and demand for this shave I have recruited Claire Minihan to assist me with doing all the final blade fitting, sharpening, and finishing of these shaves going forward. If you are in the windsor chairmaking world you already know Claire for her fantastic travishers. They are phenomenal and there is no one better to set up a tool like this than her. Without her assistance I would very likely be unable to produce this tool with any regularity. 

As promised, here are the Use & Care Instructions for the shave. It includes a simple shop made jig for sharpening the blade, if that's your style. I use it primarily to establish the hollow grind at my bench grinder. 

Keep an eye here and on my Instagram feed for news of the next production run. Enjoy!


Monday, February 29, 2016

More Windsor Chair Plans From Curtis Buchanan - Plus Videos!


Curtis Buchanan has been pretty busy in the last year. If you are a windsor chairmaker then you may already know much of this. Curtis started making a series of Youtube videos back in 2011 on making a comb back windsor arm chair. I happened to get connected with him to draw up the technical plans for that chair so that he could make them available. It was a long process as I am not a professional illustrator. It was done in my spare time - so you can image the improvements that could be made to the process. I got quite busy after the first two plans were finished and it was at that point that we decided to find someone who could focus on the drawings full-time and bring professional illustrator skills to the table, as well. After filtering through a couple of illustrators we landed on Jeff Lefkowitz. He is a chairmaker and a former graphic designer. He's a real gentleman to work with, too.


There are now four plans available - the comb back arm chair, continuous arm chair and rocker, fan back side chair and the hoop back side chair. You can check those out here. Most recently, the comb back arm chair has been updated to have 1:2 scale front and side views in addition to the patterns. It has been a pleasure to be a part of this project that brings such high quality plans to the general public.

You might also enjoy a few recent documentaries that have been made regarding Curtis' work and life. This first one is from the PBS show "A Craftsman's Legacy" entitled "The Chairmaker". You'll need to register to view this episode. It's free and so far I haven't received a single piece of spam. The other episodes are quite enjoyable as well.

Fine Woodworking also made a nice video here.

Enjoy!!!

Monday, February 15, 2016

Roubo Hollows and Rounds Popular Woodworking Article April 2016 Edition!


For those of you who are interested in planemaking, you'll want to keep an eye out for the April 2016 issue of Popular Woodworking magazine. I wrote the cover article on the subject of making hollows and rounds in the style shown in André-Jacob Roubo's masterwork "L'Art du Menuisier." His plates show side escapement planes that can easily be made by the craftsperson. This article deciphers the basic construction behind those planes. My aim was to explain a simple method you can use to reproduce your own hollows and rounds. I suggest dimensions for three sizes - 1/4", 3/8". 1/2" (no.4, 6, 8). 

Roubo Planemakers Toolkit

What's so interesting about these planes is that they are made using the typical hand tools that a joiner would have, rather than specialty planemaking tools that would be required to make the traditional British and American-style side escapement planes typical to the 18th-19th century. With the possible exception of a carving gouge (to shape the escapement) and a 1/8" narrow chisel (for clearing the mouth), the average woodworker probably already owns the tools they'd need to make these planes.
I think you will really enjoy what is contained in this 8 page article. What you learn here will not limit you to hollows and rounds - you can easily experiment with other traditional profiles or develop your own.

By the way, this plane article all started with a little 1/4" ogee plane that I made one afternoon while Peter Galbert was teaching a chairmaking course here at my shop. He gave me the encouragement to present it to PWW as an article. I'm glad I did and I hope you enjoy it. Below is a little video of that plane in action.


To keep up to date with my daily shop work and shop tips follow me on Instagram @calebjamesmaker. Enjoy!

Thursday, November 19, 2015

Now Taking Pre-Orders on Panel Raisers

So, I've been toying with different versions of panel raisers since this time about two years ago. I have had a lot of questions on the subject. When am I finally going to offer them for sale? Well the bench plane version has hit some road blocks. Getting the proper size stock is not easy in any reasonable quantity. As many of you know, I dry my own stock for that reason. I do have some air drying right now but it will be quite some time before it is ready. Then the irons that I specify for the design is another issue altogether.


Recently I decided to take another look at the panel raiser in a side escapement format and have developed a plane that I am quite happy with. It does all the things I want it to. And, I have enough stock on hand to produce a decent size run of this plane with irons that are available from Lie-Nielsen. I can finally offer a panel raiser!

This plane is, as I said, a side escapement plane like other moulding planes. It has a skewed iron for making cross grain cuts that are smooth. It is bedded at 50˚ for hardwoods. It will make a nice clean fillet in hardwoods without a nicker.


The width of the profile is 1-1/4" with a depth of cut of 5/16". This is sized for furniture panels. With that in mind, if you typically use a groove in your panel frame of 1/4" then your panel would be anywhere from 9/16" thick and up. I would typically raise the panel on the front and then flip it to the back and use the same plane to cut down only as far as needed to cut the tongue thickness to match the frame groove. You can, of course, decrease your tongue thickness to say 3/16" and the panel could be 1/2" thick. This size gives you some flexibility rather than being sized for only 3/4" thick panels.

Here is a video of it in action. I'm getting a bit fancier with my editing. Now you don't have to watch all the boring parts and both the cross grain cuts and the long grain cuts are all in one video. 


If you would like to place a preorder then follow this link to my shop. I am limiting the production run so if the quantity says 0 then you can shoot me an email to get on the waiting list for the next round. I will be offering alternate profiles in the future. 

Monday, October 12, 2015

Want to Donate and Help Others In a Time of Need? Here's How

As I sit here this morning thinking about all the work that needs to be done to recover from last week's storm here in South Carolina I remember back to when I had more time to volunteer to help others in times of need. I have very fond memories from June 2001 when, after my wife and I had been married for only two weeks, tropical storm Allison hit Houston, TX where we lived. It was a terrible disaster from all the flooding. We lived in a part of town that was spared, so what were we to do but jump in with both feet and start helping? We volunteered nearly every weekend for 9 months straight. We were part of a crew of great volunteers that helped repair about 800 homes in that time. It was a mammoth effort but just a small part of all the work that went on that year and the next.

Then came hurricane Katrina in '05 and all the refugees that fled to Houston for relief. Right on the heels of that came hurricane Rita that hit south east Texas. There we were, my brother and I and our wives, sleeping in tents and cutting and removing downed trees all day so that crews could come behind us to put tarps up to keep the rain out of already seriously damaged homes. The look of relief on the homeowner's faces - knowing that they weren't in it alone - was priceless. Those were some great days.

Next came hurricane Ike in '08. I had a box truck for my business that happened to have a refrigerated cab on it. I never used it for refrigeration, but it came in handy when my brother and I delivered ice, water and other perishable food to those in need. Others donated the supplies, we donated our time and fuel. It was definitely a team effort.

It was great being a part of those things and I really miss it. As I sit here knowing that there are so many that need a helping hand right now, I recall a woman that, when she saw us just a day or two after a hurricane damaged her home, she said, "I was ready to lay down and die until I saw you all coming to help." It's amazing that we can have that impact on others just by our presence. We hadn't even lifted a finger yet. Money is one thing, but being there is much more.

I am writing this because right now I seem to be out of the loop of those volunteering and I also have family responsibilities that prevent me from dropping everything to go see where I can start working and helping. I know I will catch wind of it in the coming days and I hope to see what I can do then but, for now, I want to encourage those of you that see a need and can do something to jump right in. It's probably one of the most fulfilling things you can do to express your humanity and the bonds you form with others while doing this will last a lifetime, I promise you.

In view of the situation I am going to donate 100% of my sales on some select planes that I recently completed after filling back orders. Here's the deal - you pledge to volunteer your time to help somewhere, anywhere, and, in exchange, you can purchase one of these planes for $250 (reg. $345) - all of which I will be donating. If you aren't able to give time, then please donate to an organization that helps others in need. I will leave it up to you to decide how much time or money you wish to donate - just do something! Please visit my shop to purchase the qualifying items and help me do something too!

Thanks for reading.


Wednesday, October 7, 2015

Modern Vs. Traditional Spoke Shaves


As many of you already know, I began my woodworking career as a furniture maker and quickly went to making chairs almost exclusively. As you can imagine, that let to a lot of time using a spoke shave. I have formed a few opinions on what makes a great shave and have been interested in exploring what makes a really great traditional spoke shave.

Back in May of this year, while hosting a windsor chairmaking class by Peter Galbert, I got poking around his shave collection and quickly settled on one that I have had a deep interest in making for quite some time. It was a traditional shave in boxwood with a blade that is fitted with bent tapered tangs. You probably know the style. They were made by the thousands in the 19th century but any you find today are usually quite worn out from use.

I wanted to take a moment and describe the difference between these spoke shaves and modern ones. I think great examples of a modern spoke shave are the Brain Boggs designed ones that Lie-Nielsen sell. They are so well known that I need not say much. They function much like a plane and are intuitive in how they are used and set up to anyone that has used a hand plane. They're great on long grain wood fibers and for making final finish cuts.

Now there are the traditional spoke shaves that are not intuitive to use for the novice. Explaining their function is not simple to do in words. I have a video demonstration below.  Essentially the blade has one setting. However, the depth of cut is determined by where you apply pressure on the toe of the sole in front of the blade. The toe is slightly rounded so if you rock further forward you will be taking a lighter cut while if you rock further back toward the blade you will take a deeper cut. Much like a travisher. This functionality makes these shaves incredibly versatile. You can go from a cut that is hogging off material straight into a finish cut, all done by feel. These may feel a bit awkward to use initially because of this versatility but you will quickly realize how great these shaves are. They really excel on end grain shaping such as on the front of a windsor chair seat.

One of the drawbacks I wanted to address in this design was how quickly all wood spoke shaves tend to wear unevenly on the sole. Some try to address this with a brass sole but I wanted to keep that all wood feel and avoid adding the clunky appearance and feel that brass on wood seems to do. I added an end grain boxing insert to the sole like you would see on a wooden plane. This takes more work than slapping a piece of brass on but I am really happy with the results. This is a prototype shave, by the way, so I promise the production ones will have a centered blade and boxing. :)

Boxing insert to minimize wear
After several months of exploration I developed what I think captures the feel and function of a traditional shave while also capturing the look of one, as well. Here is a short video describing the function of my traditional style spoke shave versus a modern one.

Stay tuned for more on the production of this spoke shave. In the meantime you can email me at calebjames(at)me(dot)com if you would like to get on the wait list. I am aiming for December 2015 to start on these and possibly completion in January. The price will be $185 + shipping.

Enjoy!