Showing posts with label comb back arm chair. Show all posts

Thursday, May 30, 2013

Comb Back Arm Chair Seat Carving Photo Series

That title is a mouthful. It is that simple. I have been saving up gobs of photos from shop projects. It seems I am really good at taking photos but very poor at blogging them. Maybe, I should be on Instagram instead. Nay... I like to ramble.

Anyhow, these are a series of photos I took in Curtis Buchanan's shop while I did my research on the drawings for his chair plans I drew. I think the photos are pretty self explanatory so I won't go into detail to much. Others that are better at explaining it than me have already done so but I find that lots of pictures really help in seeing all the angles. Hope you like these.


Lay out the pattern, drill leg holes, arm support, center spindle and a few practice holes on the edge. (Was a different bit than I was familiar with :) )


Fit legs.


Adze work and carve gutter.


Bandsaw front profile and Inshave work.


Layout outside edge of seat.


Front view of layout.


Remove bulk with drawknife @ front vise. Use a wide one so your handles have more clearance for those slicing/skewed cuts.
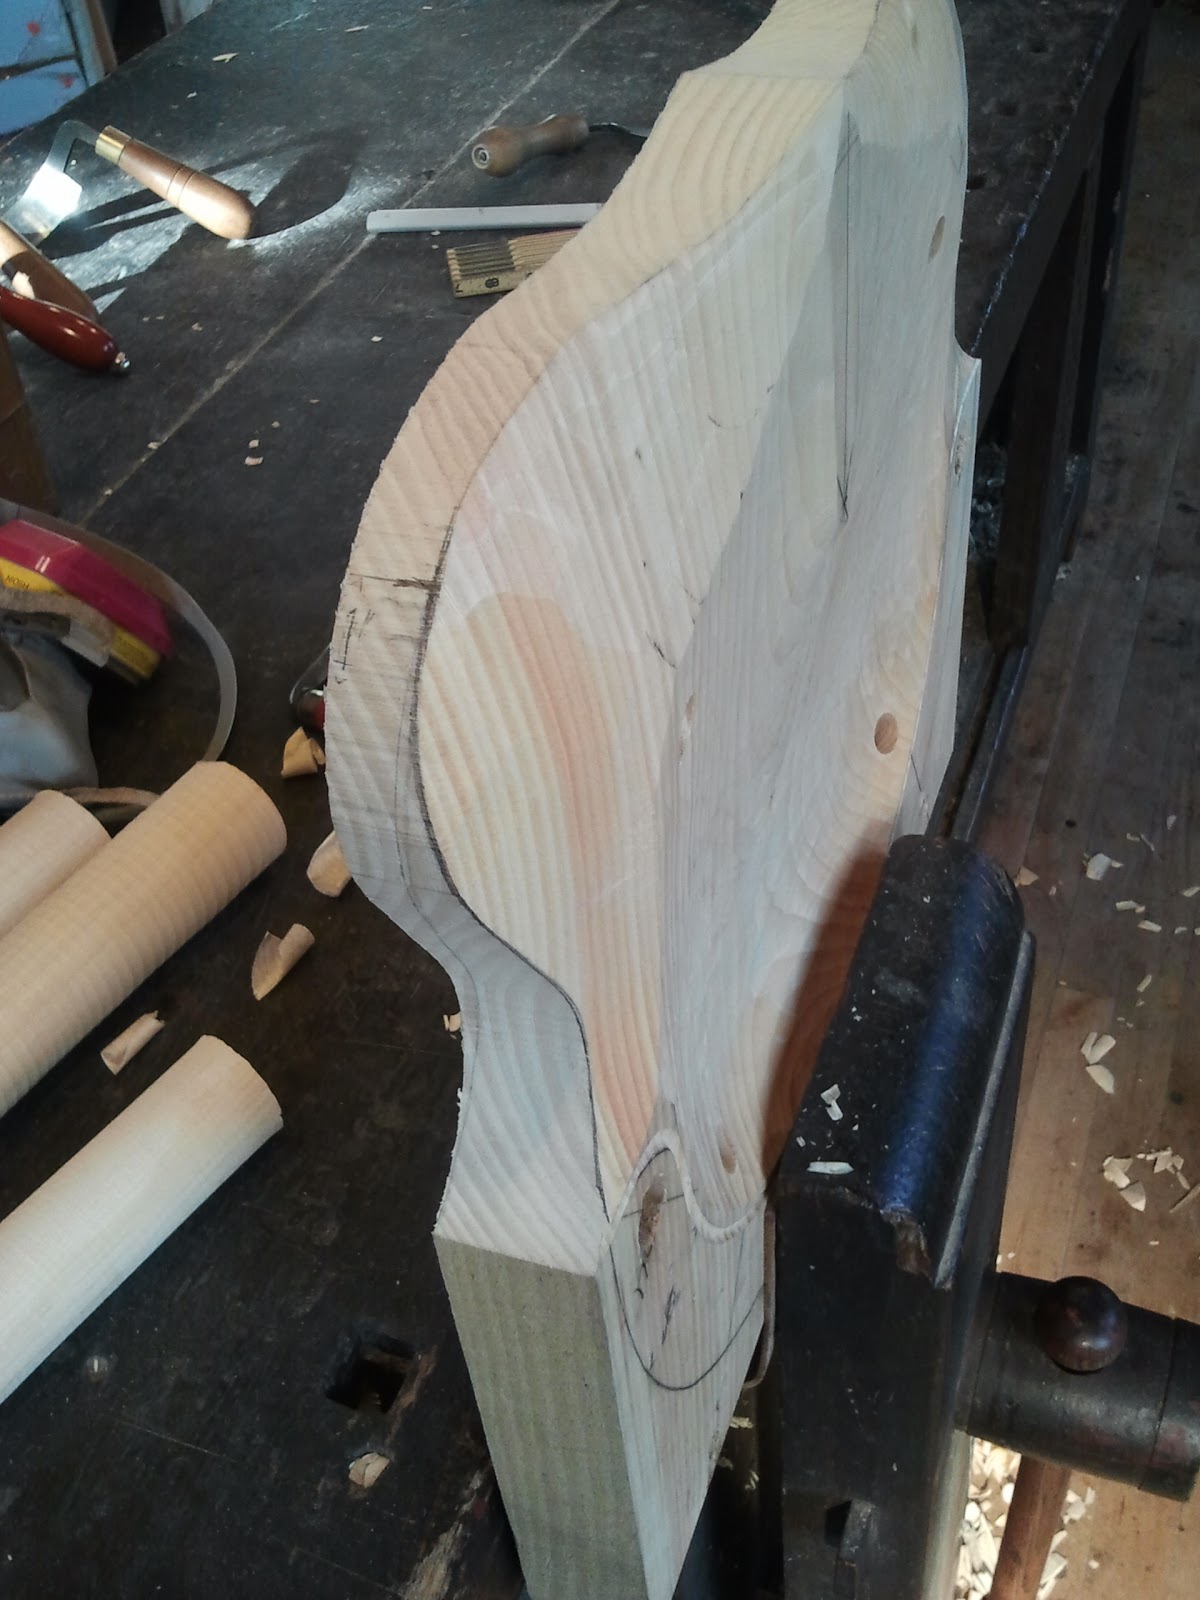

Some more angles.


Refine with travisher. Use inshave to work concave area near gutter at arm post. Also some initial spoke shave work


Block plane down from front of pommel towards depth of seat. Redraw center line for reference.


Refine pommel with travisher and spoke shave seat front.


Two more views.


Layout seat bottom.


Drawknife front bottom edge and follow with spoke shave. Give it a slight convexed edge about the last 1/2 inch back.


Layout seat side and drawknife only. Ok you can use a spokeshave or other if you must. I won't judge. :)


Sorry I don't have step by step photos of this part. I don't like to stop when I get going. Lots of focus to do this right with the drawknife only. Lots of skewed slicing cuts here. Have a very sharp knife. If you have two drawknives you might leave one shaped and sharpened for just this task.


Shape back edge in two steps (refer to layout photo above) with drawknife and follow with spoke shave to blend.
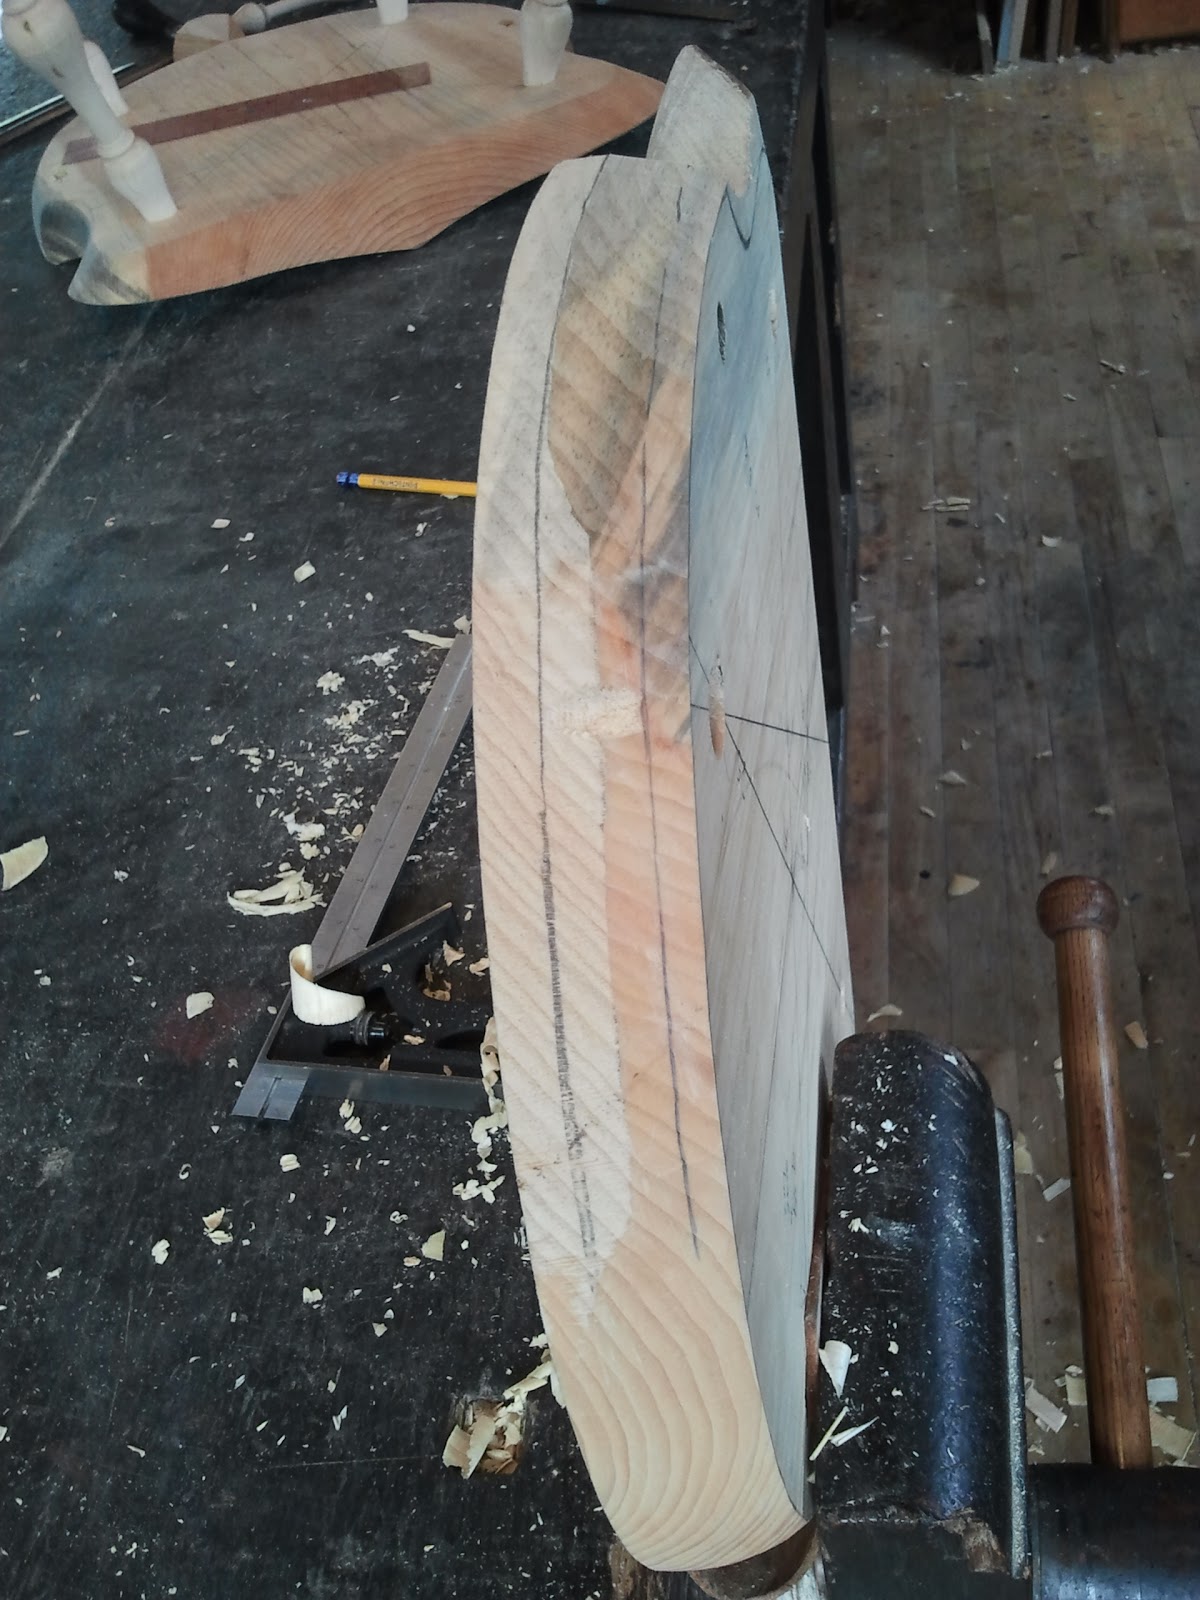

Another view. Don't forget to chamfer the back top edge of the seat with drawknife. I forgot to take a photo.


Bottom view complete.


Another view.


Finish up top of seat only with scrapers followed by 180 grit paper. Raise grain and lightly sand with 220. Now leg it up!

Hope that was informative. By the way this is in eastern white pine from one solid board. That makes it so much easier to shape.


Monday, March 25, 2013

Comb Back Windsor Arm Chair Plans by Curtis Buchanan

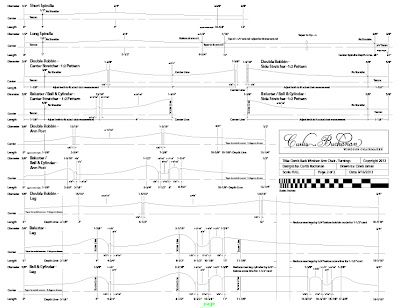
So finally they are ready! What are they? These are full scale drawings of Curtis Buchanan's comb back windsor arm chair that he made in his Youtube video series. If you have ever wanted to make one of these now is your chance to have all the details in a truly refined design.


These plans are not simply a "rough" design of the original. I took every effort to show exactly how his chair looks once completed. These are not plans intended to "simplify" the making of a really great chair design for the novice woodworker. (These drawings won't talk down to you) They are for those that want to challenge themselves and make an heirloom piece. 

We truly feel that no detail is left out. I worked with Curtis for over a year, on and off, working on these to get them just right so that they as useful and as detailed as possible. 


Here is a Youtube video of Curtis talking about the plans, the DVD, and topography map of the seat that Jake did. That map is so awesome and really completes these plans. 

There are more to come. Watch for the continuous arm chair version that we hope to have completed in the coming months. For now go to Curtis' website and purchase these. I don't stand to profit from these (disclaimer). However, I simply wanted to work with an awesome craftsman and learn from the best while doing my part to make the sharing of this craft open to others. Your support will make it possible for more plans to come.

Thursday, September 6, 2012

Volute Carving - Behind the Scenes

Well I don't know if that is the best title but here is a peak behind the camera of what the tools look like up close. Sometimes the hardest part seems like just figuring out what tools to do the work with. We spend so much time looking at tools in the woodworking world that it is hard to just get to the woodworking. I feel your pain. So I wanted to share what tools Curtis had me using while I carved the volutes on the crest of his comb back arm chair.

If you have been watching his video series then this would go with video No.9. I don't plan to give instruction on how to carve the volute since Curtis' decades of experience shown in his video is far more useful.


The above photo is of the tool set for the carving. You can see the sweep stamped at the base of the blade or handle. Note that there are two different no.7 sweeps. Keep in mind that sweep varies from tool maker to tool maker. And the sweep varies based on the width of the gouge from the same maker. So I have shown a ruler to judge the size. (These are actually metric gouges.) I am showing this not so that you can buy the exact tools but it will give you a better idea of the tools to look for when buying. 

The best thing to do is take the volute pattern you are wanting to carve and then match up the sweep of the gouge to the pattern until you have a set of gouges to carve that pattern.

Below is a photo showing generally where the gouge is used. The blue marks are the line where I worked up to using that particular numbered gouge in doing the initial defining of the volute line. You can see that the no.3 gouge is used only at the very first then follows with the no.5 for a large portion of the rest and so on. It is nice to see though that two of the same gouges can be used in carving the recessed area with the exception of the larger no.7 and no.8.

The orange lines follow the same pattern but are in regard to the recessed area that is carved out. Of course this is not an exact reference on how to carve this but just some guidelines that could aid you when starting to carve one of these for the first time. 


Take your time. Use a good solid mallet that doesn't bounce and feel the wood respond as you carve. Remember that oak splits well for getting that straight grain fibers we want for almost every other chair part but it can split when we don't want it to when carving. Keep an eye at the top and bottom of the volute portions where the short grain can quickly break off. 

Now get out there and do some carving! Keep a smile on your face... you do better work that way.


Saturday, September 1, 2012

Comb Back Windsor Arm Chair

About a year ago I had a nice opportunity to come and work in the shop of Curtis Buchanan a windsor chairmaker in Jonesborough, TN. We spent two weeks, including weekends, pouring over the construction of one of his better known pieces. Many have been watching his youtube series on the making of his Comb Back Windsor Arm Chair. If you haven't seen it yet then you have to check out this link, for sure. http://www.curtisbuchananchairmaker.com/videos.html

Below is a picture of the chair I made based on his original design.


I was there when he was about 2/3 of the way through making his popular video series and my time there allowed us to work on some projects that both aided me to understand his traditional methods to a greater degree while I helped on some behind the scene things that hopefully will be coming out soon. I am very excited about them and as they progress I will touch on them more.

Until then I thought it would be fun to share some of my observations while building this chair myself and a few notes that might help the new chairmaker understand some of the finer details. This is a very complex chair.

I plan to share first my observations about the carving of the volutes for the knuckles and ears, so stay tuned.