Showing posts with label draw knife. Show all posts

Tuesday, October 22, 2013

Peter Galbert Drawsharp - Tool Review


I should start off by making it clear, if you don't read my blog, that I am friends with Pete and this could be easily categorized as a biased review. I realize this but I am a chairmaker so here is my opinion. In fact it is probably just as much about my thoughts on sharpening in general.

If you haven't already seen the videos Peter has posted on how this works in use then I recommend checking them out to get the concept. UPDATE: Pete put up a post talking about why he designed this tool. Check it out here.


So is the Drawsharp just another sharpening jig? At first that is how I was looking at it. I guess it is. But I was thinking about how a turner uses jigs to rest there tools on supports to grind the edge or hold the tool in some other way while sharpening. I use jigs in these instances because they make my sharpening retain or achieve the shape I want as well as get there quickly without worrying about achieving a cutting geometry that is crucial to good turning. On the other hand, unless I see a real advantage, I am just too focused on what I am making to fuss with a jig, whatever it is, unless I see that it actually makes my work faster, better, or lessens the interruption of my craft which I think is hugely important. I sharpen all my plane irons by hand for this reason though I can see someone arguing for using a jig to do this faster but they just seem to irritate me.

What do I think of the Drawsharp? Is it a faster, slower or just a more accurate way of sharpening? Before I answer that I should say that I think this tool has two distinct tasks it can accomplish. First it would help you rehab a drawknife that is in the typical shape when found at a flea market or the like. Essentially the edge is very beat up. If you don't want to attempt doing all the clean up on a grinder then this is a far less intimidating way to get it to functioning and I think it may in some ways be just as quick if not possibly quicker. This of course really has more to do with the current condition of the drawknife.

My drawknives are in fine shape so I can't really comment on this process or the speed other than messing around with a few beat up drawknives at Peter's booth at Woodworking In America, the show these debuted at. It was quick, I must admit. It was simple for the first time user which would be the main reason I see some one like that using it. I came to realize it is much cheaper to rehab 3 flee market drawknives even considering the purchase of the Drawsharp than it is to buy a decent new drawknife which then still leaves you with only one drawknife and the standard method of sharpening it. A few different drawknives in chair making is useful if not necessary.

That takes me to the second task this accomplishes and the one I think makes it really most useful to me. It maintains the edge of the knife consistently and without fuss. For instance it takes me about 8 minutes to set up and resharpen my knife and get back to work with my traditional method which is a jig that holds my sharpening stone in an elevated position above my bench. However, the Drawsharp allows me to never even leave my shave horse to get my edge back up to full throttle. It seems to take me about 45 seconds once it is in my hand to be satisfied with the edge especially since maintaining it is so easy I don't even think to not just do it once I get the notion it is approaching dull.

In the end I would say that two types of people would be suited to the Drawsharp the best. The first is if you want to rehab a knife or knives and don't feel comfortable with the grinder for this task. I don't blame you since it is tricky.

Second is the person that does a lot of drawknife work and the down time this saves out weighs the cost of the tool or you simply do this for a hobby and your free time in the shop is of more value than the cost of the tool.

So if you don't mind rehabbing your drawknife with a grinder or you have enough time in your craft to sharpen the old way or enjoy this method of sharpening then you can pass on this tool.

Hope that helped anyone who was trying to decide if this tool was right for them.

Final disclaimer- I do not profit from the sale of this tool.

Thursday, August 1, 2013

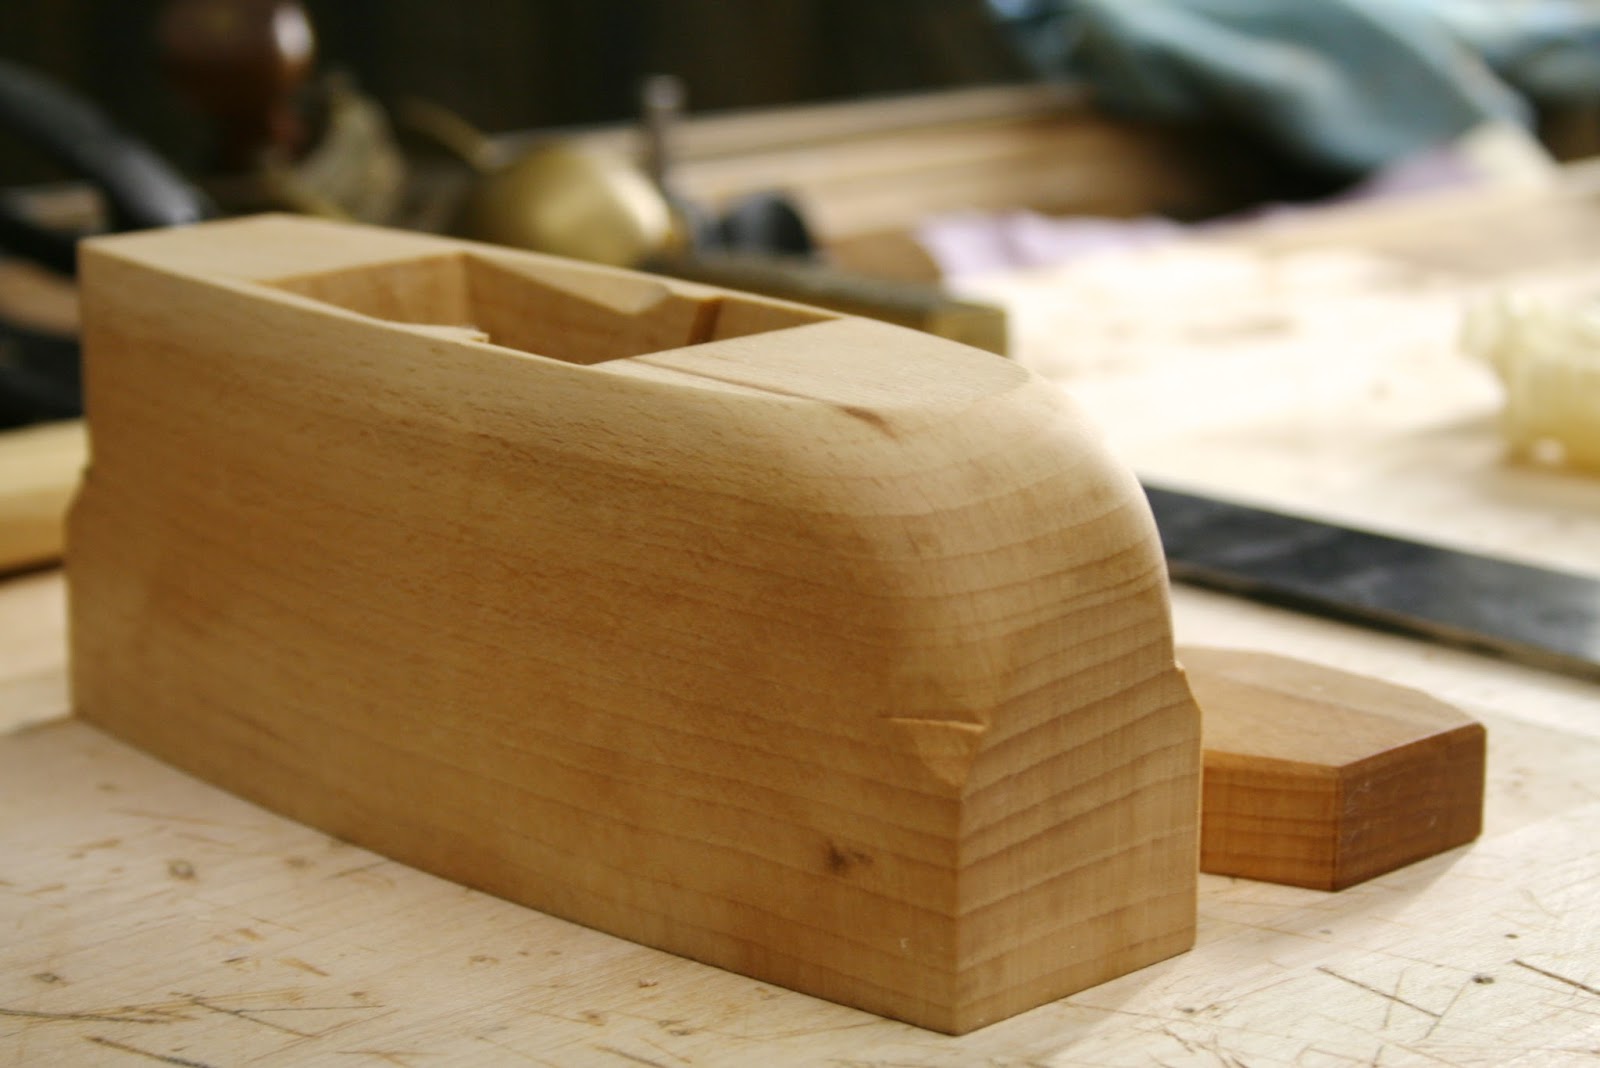
The Coffin Shaped Smoother- Up Close- Part 2

I don't know about you but videos are excellent to get the feel of something but to study something you want to make, pictures are it. 

I tried to include a few angles that showed off some of the different parts, both assembled and disassembled. I threw in a few artsy shots, I can't help myself.


Notice the iron is only heat treated at the end. I never bother trying to do the whole thing. It would take you a very long time to work past this end part in use, anyway. Japanese blades are usually laminated with steel, good for cutting blades, only at the end. So there you have it. I don't know what other planemakers do.


The secret to that curving chamfer down the side is to use a drawknife. No planing down a curve here. Spoke shave would work too but I like to go right at it. Plus I already have the drawknife out for making the coffin shape and rounding the heel. Thats right, no band sawing on these parts. I want to be dead on and I would have to clean up the bandsaw marks with something anyway. Probably the chairmaker in me. The drawknife is always in the hand.


Seeing into the mouth should help demystify that part a little.


Make your vertical chamfers with a chisel and #5 sweep gouge.

If you noticed the growth rings, I broke the rule here of putting the bark side of the wood to the sole. I don't hold to that religiously. If the pith side has a flatter growth ring shape then I will use that side. The more parallel the rays are to each other the less change in shape that area will experience. 

Maybe I will post sometime about how beech grows to explain why that happens. I also have other theories as to why for practical reasons the bark side was usually used. Thats for another time.


Here is a little perspective in use.

I can't remember the last time I wanting to make something this much, just so I can use my new tool. Ok, I will stop blabbing. 

Have fun in the shop!


Wednesday, May 18, 2011

Shave Horse

Shave horse? Do what? Yes it is a strange name for a tool but there you have it. Since I often mention that my chairs parts are either made at my lathe or traditional shave horse I might better explain a little about the latter one.

Here is a picture of me sitting on my shave horse. It is operated by foot pressure on a wooden leaver that closes a leather wrapped wooden jaw that in turn holds a piece of wood that can then be shaped. Why not just use a vise, you ask? Well this tool allows me to orient a piece of wood in virtually any position I need to shape it without damaging it. It also allows me to run a tool across my work piece in a way that a vise would never allow. One added benefit is that I have lots of leverage to make smooth cuts. 


A typical piece that would be shaped on this would range from a post on a traditional chair, like my french farm house style chairs, or an arm on a Danish lounge chair, such as the ch44. Basically any part that has rounded and curved shapes. I like to think of this tool as the old world version of the modern CNC machine. It truly allows me to sculpt wood rather than just machine it.


Below is a close up of the use of a draw knife, which is typically pulled but can be pushed as well. It looks like a crude tool but it is actually capable of making precise cuts. It is used in the initial shaping of a piece then followed by finer cutting tools such as the spoke shave I am using in the picture above.