Showing posts with label Around the shop. Show all posts

Monday, November 17, 2014

Breaking The Silence

It has seriously been too long since I last blogged. You would think I had nothing good to talk about or show off, but that would not be true. I have, in fact, been so busy that the days just seem to whiz by.

I blame it on two things. One is that I started posting pictures of shop stuff on Instagram and that seems to give me an outlet for my desire to share happenings in the shop. Honestly, it is pretty superficial in that regard, though. I like the meat, the deeper stuff. That only takes place here at the blog, so I need to get my butt back in the chair and out of the shop on occasion.

Second, since I have been full on switching the shop from chairmaking to planemaking, I have had a blast of new inspiration going on. It has kept my head going so much that to stop and put it into words has escaped me. Subjects are there but only half formed. Prototype planes are in the works but only half completed or nearly completed. I have hardware and other things being designed and out sourced on their way to me. And, in all that, I have made a load of beading planes and communicated with a load of customers.


On that note, I am getting used to working with what looks to be a few hundred customers a year as opposed to doing 15-20 big furniture projects a year as before. And, as far as furniture goes, I recently finished up my last furniture project that I had on the books. It's all feeling pretty strange to me but I'm really loving the transition and excited to see how the next year progresses as a full on planemaker.


That all said, I still have several projects for Danish furniture that I will be doing as a personal project. More on that to come. I first have to get my daily work lined out, and it seems to be coming together beautifully.

I have a list of topics for blog posts that I think everyone will find interesting. You chairmakers and planemakers out there will be sure to find some educational stuff in there. Several short videos I have shot on subjects like glue up and a brief one on weaving. One on putting in boxing for planes and making mother planes and the list goes on. So stay tuned I am going to try and catch up.

In the meantime enjoy a few photos of the stacks of beading planes that I have been making.


Take care all!

Wednesday, July 23, 2014

Planemaking And Chairmaking Classes In The Works! *PLUS* Surprise Visitors To The Shop!

So, yesterday I had a nice surprise. If you keep up with chairmaker Glen Rundell then you know he has been touring the Eastern half of the United States over the past few weeks. Mostly hanging with Pete and the gang up in Massachusetts, doing the Lie-Nielsen open house (which I missed, ugh!) and things like that. Glen hails from down under in Melbourne. He has come a long way to get some fresh inspiration to take back home with him.

Anyway, Glen was in Virginia taking a class with Jeff Lefkowitz, who teaches the chairmaking courses for Brian Boggs and after the class they loaded up and came down for a visit to the shop. It was a very pleasant surprise.

Left to right; Claire, Caleb, Jeff, Glen

Truthfully, he gave me a day or so notice, so I had good motivation to clean up the shop. I am in the middle of paneling the walls. More on that later. And my wife made some enchiladas verdes as a special treat for lunch. Handmade corn tortillas, umm. She's a Canadian that cooks some good Tex-Mex. Got to love it! (I am really getting off track here)

As I filled them in on the goings on around here I realized I haven't been blogging much lately. I am not one for fluff or filler on the blog but I think maybe I should share with everyone else as well. As I was telling Glen and Jeff, I am planning on taking one half of my shop and dedicating it to a classroom and am almost halfway there. I get pushed by just about every craftsman I know, that I should be teaching classes. I get requests on an ongoing basis as well. I am finally coming around to the idea.


I am looking at, of course, teaching some planemaking classes. Possibly a four day class on making a pair of hollows and rounds and a rabbet plane. I may split these up as two different classes. These would be a really good start and you can make the majority of planes based on those two formats.

The other classes would be some introductory classes on chairmaking. One will be on making a Danish modern stool which will include lathe work, joinery and danish cord weaving. A two or three day class depending on size. The other will be a three leg windsor stool that will have lathe work, hand drilling, reaming and seat carving. Probably a three day class as well depending on size.

I am up in the air about prices as of yet. It has a lot to do with class size and demand. I have room for about six students at a time though I would tend to want the class sizes a bit smaller. We will see.

Send me any suggestions or classes you would prefer to see available so that I can plan accordingly. I am not asking for a commitment but if you are a reader of this blog and see a class here or something related to what I do that you would like to take at some point, then let me know. Your feedback will make a difference.

Thanks and I hope you are enjoying your summer!


Friday, May 24, 2013

Ahh... The Perfect Summer Day On Repeat

So, I have finally got my first batch of beech plane blanks out of the kiln. I have dried steambent wood parts in my small light bulb kiln for chairmaking for quite some time now. That is a whole different process really than when drying wood blanks to make wooden plane bodies.


What is my aim when drying wood for plane blanks? Well, with a background in working greenwood I always have appreciated how wood works that has been air dried. It is just different. I don't want to over rate it but the way the tools cut it is just different. As you can imagine I prefer it to the super dried stuff.


The difference lies in the fact that air dried wood never gets to a high temp like typical kiln dried wood. In the kiln the temp will generally get to the 160˚ range for many woods and some are higher. This is often done just to be safe and kill bugs or to set pitch in resinous woods like pine and to get the wood dried to a very low moisture content. However, it isn't actually necessary to heat wood this hot to dry it.

It is important to appreciate that commercial kiln operators are concerned with speed since this affects profits. Not knocking this, they are businesses, after all. However, the resulting product is not as good as it could be for the artisan woodworker. I have been completely sickened at times to have bought a wood like white oak that was beautiful wide boards and paid premium prices to only find that 30-40% was a waste because of drying defects hidden within the wood.

Anyway, these sorts of things, among the fact that I couldn't find certain wood cut and dried in the orientation or sizes that I wanted, lead me into the kiln drying business. ...for myself of course.

So I started researching this about a year ago and decided to go with a low temp dehumidification kiln. It basically allows me to control the environment in a closed chamber. Imagine wood drying on a perfect summer day at the optimal range of temperature and humidity for that wood. Now recreate that day over and over until that wood is dry. That is what this kind of kiln allows me to do. The blanks I am drying never get over 105˚ or below an average moisture content (MC) of 10 percent.

Yes this can take longer than a high temp (HT) commercial kiln but not very much longer. For most hardwoods it can be dried just as fast. In fact since I am not super drying the wood to, say, 6-8% MC (because these will be used in a open shop environment) then I don't have to dry as long. An advantage is that a low temp dehumidification kiln uses way less power than conventional kilns. Mine can run 100% of the time for 30 days for around $53. Of course, high tech kilns like this are not cheap to begin with. Think hybrid electric cars, you pay up front to get low operating cost.

I think this is the best of both worlds. After all there are drawbacks to air drying lumber. Air drying can take several years, first off. It is also subject to a lot of drying defects in actuality since you can't control the weather, as we all know. Surface checks are very common in air dried wood and then there are woods that are very susceptible to stain from mold and fungus if not dried quickly enough or cut in the "wrong" season. Beech is one of the worst for both surface checks and fungus stain when air dried.

Here are a few pictures from the process. I wish I had some of the log getting cut up a Curtis' place. Thanks again Curtis for letting me use your yard!


Haul it...


...cut it...


...stack it...


...load it...


...check it...


...start making it...


...finish making it...


...use it... (nice hair!)


...stack it... Wait, didn't I already say that?


Friday, December 14, 2012

Custom Sized Lathe Bed Tool Rest

Learning to turn chair parts, especially the baluster turnings of windsor chairs, is a huge challenge to the beginning chairmaker. I clearly recall this process. Maybe you do too or maybe you are just now attempting this. Don't be discouraged, you will get there. Here are two things that will definitely help you on your way.

One of the two things that frustrated me when I began turning was; first there was so little proper instruction on how to turn chair parts. The turning world is dominated by vessels. Second, the lathes on the market were designed with features to suit those needs. Where was a tool rest that was longer than 12" to be found? None of the manufactures even offered an optional one to purchase.

Fortunately the first complaint is being addressed. My chair making mentor and buddy, Peter Galbert, is doing a series of articles with Fine Woodworking that specifically gives proper instruction on how to turn spindle type furniture parts. Such as those found on chairs. See the first one of three here. You need to be a member to access it. Before this article I learned to turn by watching his Youtube videos on how to turn a baluster leg and it is totally free. A must see.


Now the second complaint had to be settled by me. I, like most, struggled with that short tool rest and it really seemed to slow down my focus on learning how to turn by forcing me to stop and move the rest to address the other end of the turning. Nothing worst in slowing the presses to learning than an interruption. After I visited Pete's shop and used his 24" tool rest and then working with Curtis Buchanan and seeing his custom shop made tool rest I realized i had to get serious.

So I want to encourage you to get serious and make a long tool rest. I probably made this in about two hours and it has been well worth every minute. I didn't progress until I made this, really. It is worth it, do it, and don't look back.

Here are some photos of the inner workings. As alway, follow the rule of that, any shop apparatus should be of 10 parts or less, otherwise you are probably making it to complex.


First the part you actually rest the tool on would do well to be made of steel. Mine is 1/8 mild flat bar steel inset into the top edge of 8/4 hard maple, glued and screwed.


The tool rest is attached to shop made handscrew clamps that are used to fix the assembly to the bed of the lathe. I think a similar set up would work for most lathes despite the differences in bed dimension. I purchase only one handscrew clamp kit made by Jorgensen and split them up. The inside screw is just a threaded rod with nuts on both ends. They don't need to move once they are set to the bed thickness. Only the rear screw needs to open to adjust the rest.


I set the tool rest at about 20˚ to get the top close to the work while leaving me some room at the bottom from striking the bed. This also keeps the front edge of the body of the tool rest a bit back from the turning blank.


The rest attaches to the handscrew clamps via a bolt that passed through a slot in the rest and is treaded into a square nut housed within the end of the clamps. A square nut prevents it from turning in the mortis when tightening. I used a 3/8" bolt. The only improvement would be to make this function a quick release cam which I may eventually do.


There are some other things that will help you turn but this is a definite must have. Now get to turning! :)

Thursday, August 4, 2011

Traditional Meets Modern

As much as I love traditional construction methods because of there time tested quality, I also love modern tools because they do most of the really back breaking work of processing wood to a usable furniture building material. My shop is a blend of what I think is the best of both old and new tooling. Here is a quick peak inside and some tools I use. These are some old photos I dug up of when I moved into my current work shop. I hope this gives you a little idea of how my furniture is made.

The first photo is of some hand tools I use to finish wood surfaces and to cut and refine joinery.


These are some tools used for marking, measuring, and cutting dovetails joinery for drawer boxes.


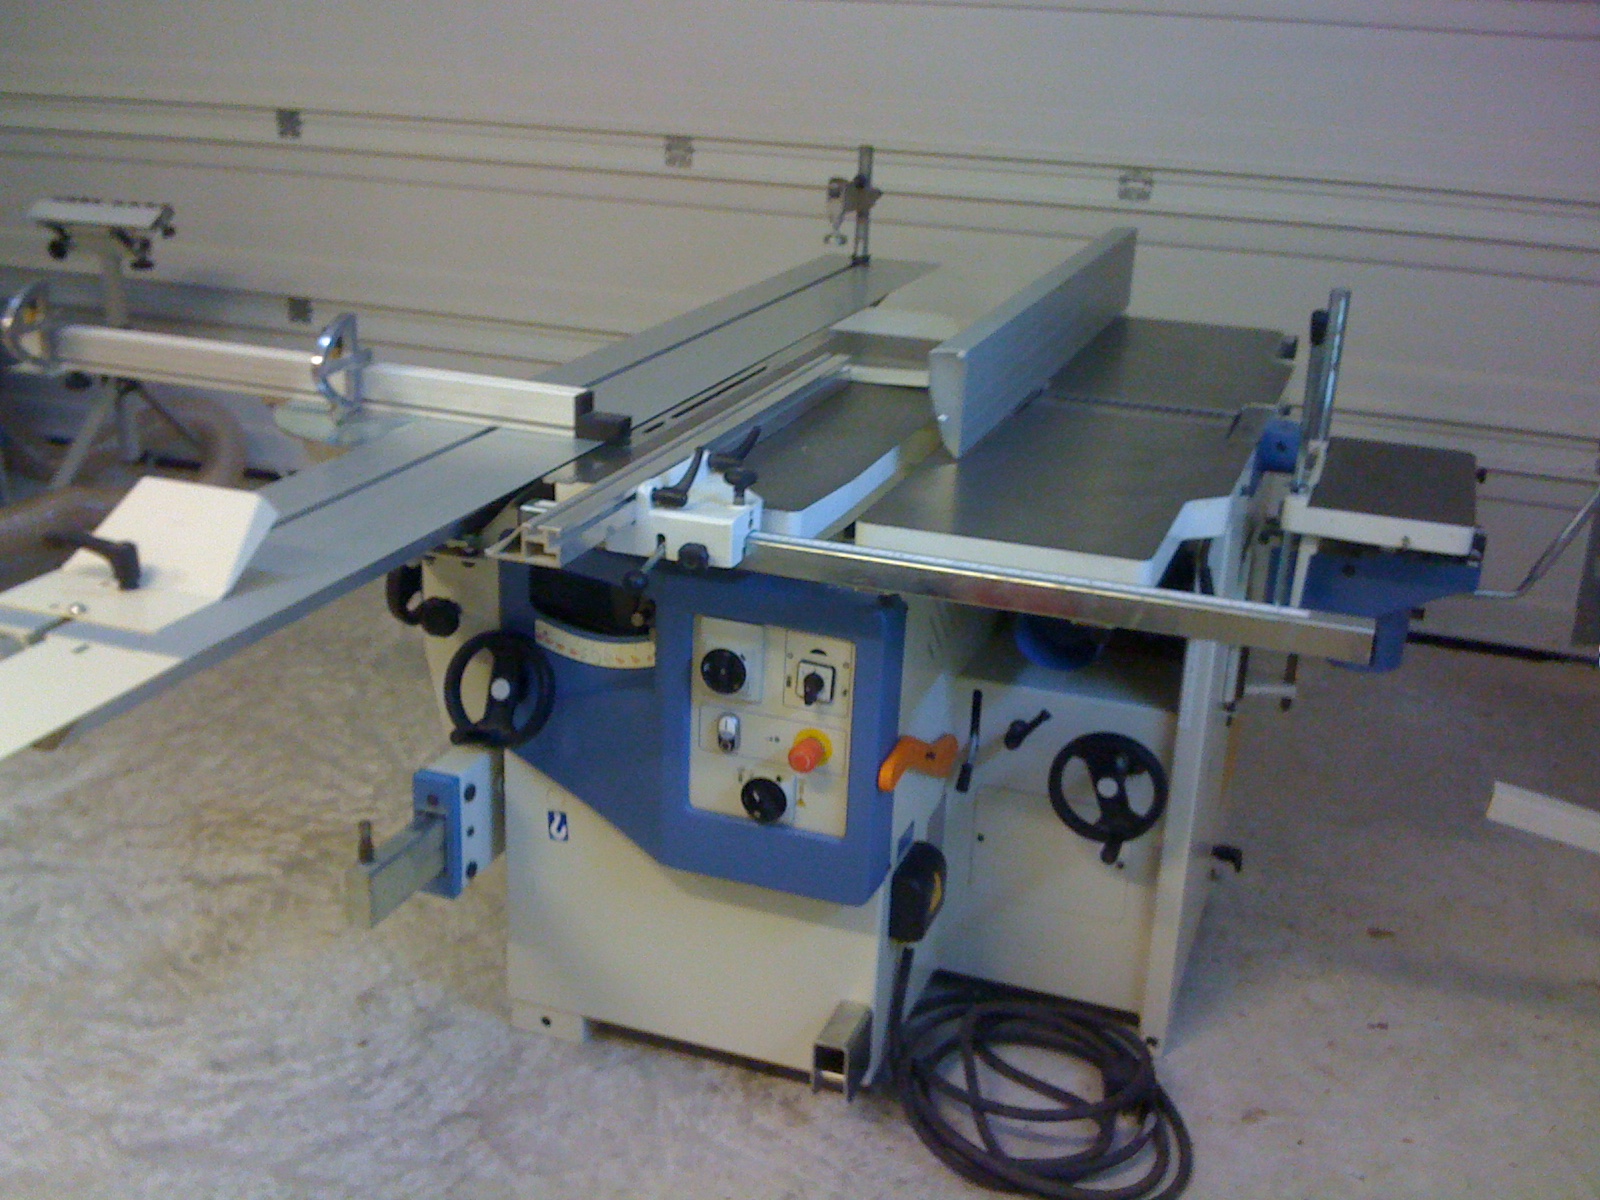
Now take a look at my 5 in 1 European combination machine. This processes all my wood from the "rough" shape it is in after receiving it straight from my local saw mill. I then follow with hand tools to build and refine my work.


Wednesday, May 18, 2011

Shave Horse

Shave horse? Do what? Yes it is a strange name for a tool but there you have it. Since I often mention that my chairs parts are either made at my lathe or traditional shave horse I might better explain a little about the latter one.

Here is a picture of me sitting on my shave horse. It is operated by foot pressure on a wooden leaver that closes a leather wrapped wooden jaw that in turn holds a piece of wood that can then be shaped. Why not just use a vise, you ask? Well this tool allows me to orient a piece of wood in virtually any position I need to shape it without damaging it. It also allows me to run a tool across my work piece in a way that a vise would never allow. One added benefit is that I have lots of leverage to make smooth cuts. 


A typical piece that would be shaped on this would range from a post on a traditional chair, like my french farm house style chairs, or an arm on a Danish lounge chair, such as the ch44. Basically any part that has rounded and curved shapes. I like to think of this tool as the old world version of the modern CNC machine. It truly allows me to sculpt wood rather than just machine it.


Below is a close up of the use of a draw knife, which is typically pulled but can be pushed as well. It looks like a crude tool but it is actually capable of making precise cuts. It is used in the initial shaping of a piece then followed by finer cutting tools such as the spoke shave I am using in the picture above.

Seat Weaving

Seat weaving is a big part of producing my post and rung chairs. I start by making all the parts and usually a little more. Wood can often surprise you as to what is inside once you cut into it so an extra leg or other part already rough cut is great to have on hand. Here are some pictures of a more than typical stack of parts while making a production run of my popular danish modern stool.  On to the weaving part next...


Weaving is so different to the process of cutting and shaping wood that it gives me a break and time to stand in one place and give my full attention to a singular process. Here you can see me wrapping the danish cord at the corner. This is the most critical part of every weave. Once a corner is turned there is no going back. A mistake made can never be corrected properly so perfection is key from beginning to end or at least the best attempt at perfection. 


A typical seat usually takes about two and a half hours to complete. My hands, as tough as they are, can only do about three seats a day even when wearing my leather golf gloves. The danish cord is so durable it can really do a number on hands. The results when completed are always worth the effort though.