Showing posts with label planes. Show all posts

Friday, June 5, 2015

Now Taking Pre-Orders on Side Beading Planes!

UPDATE: As of 6/8/15 -9:20 est- no more new pre-orders on this plane until next time. As always, THANK YOU for your enthusiasm! UPDATE

Its official, I am taking orders on side bead planes again! I am limiting it initially to the most versatile and used size for furniture, the 3/16" size. If you are interested in the 1/8" or 1/4" shoot me an email. I will then see what I can do to work those sizes into the production schedule based on demand. I'll close pre-orders shortly so place your order in the shop now. I begin production in two weeks and will be shipped upon completion there after. First shipments estimated week of July 13th.


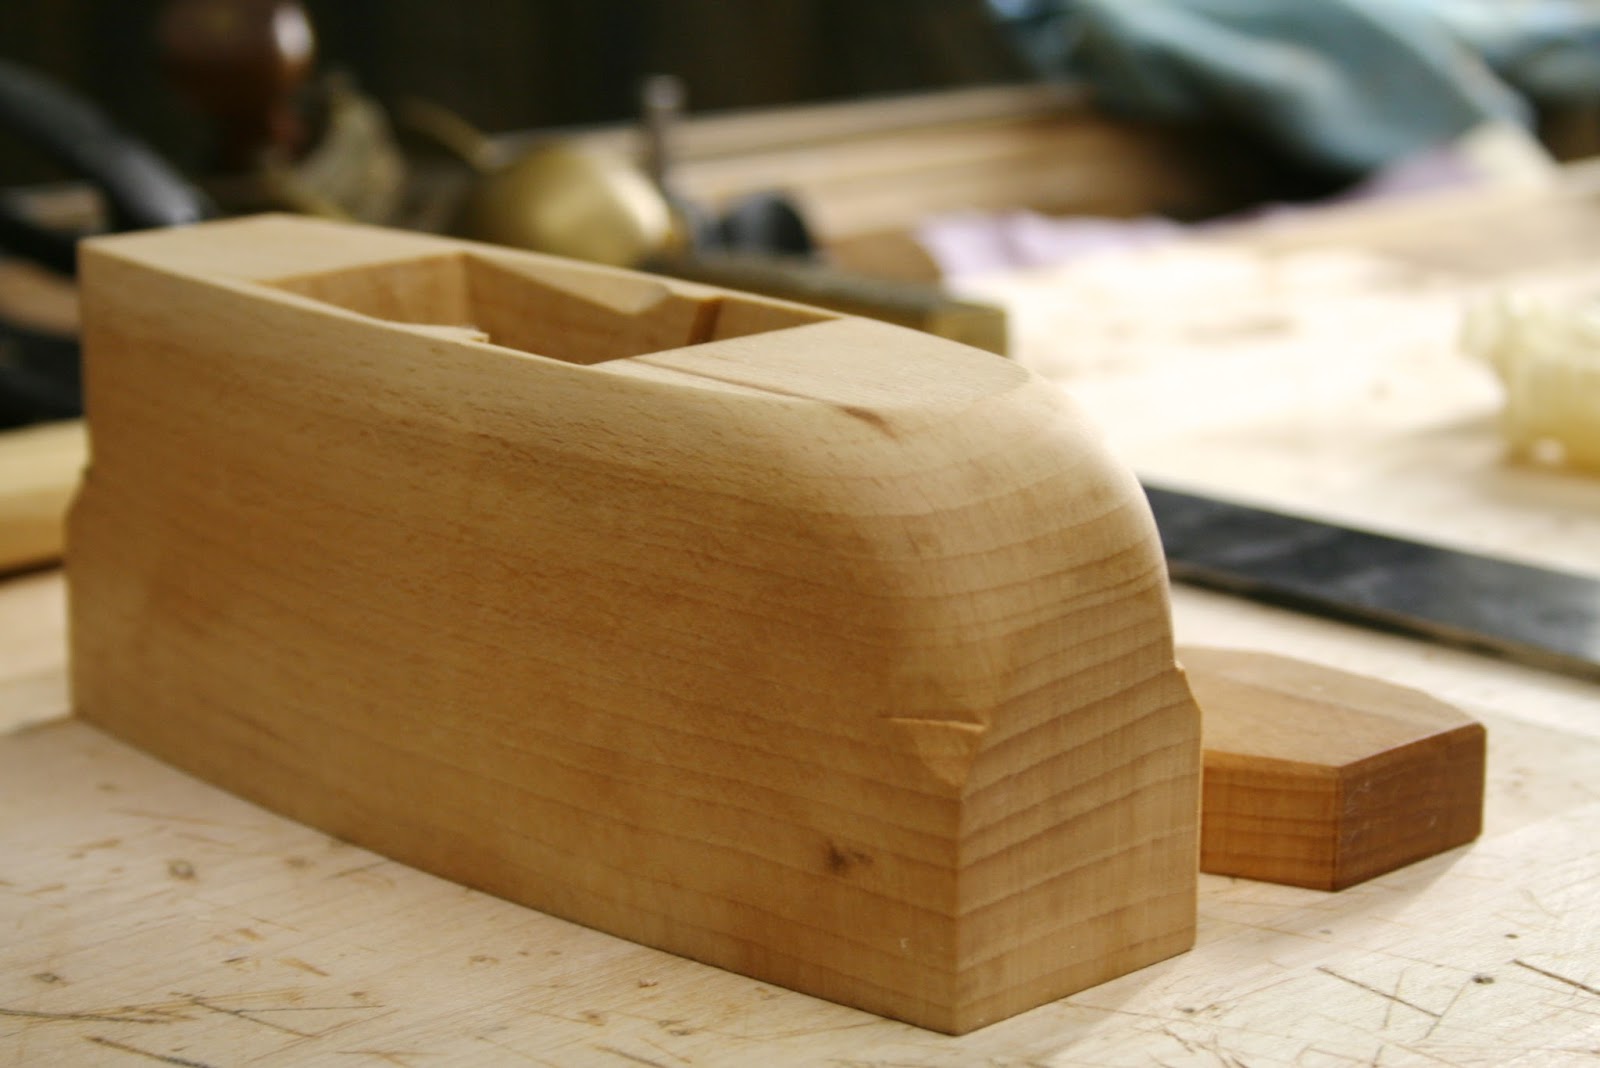
For the sake of new readers... My planes are made from stock that I cut, dry and season. It is American beech and the planes are made in a traditional 18th century style and construction. These are not four piece planes glued together here. They are solid one piece construction that will last a couple hundred years if you and your grandchildren store them properly. Once the stock is roughed out on the table saw, the making process is 99% completed with hand tools. The blades are Lie-Nielsen tapered moulding blanks that I profile and heat treat in house.


Here is a short video of the 3/16" side bead plane in use.


Monday, April 7, 2014

How to Buy a Plane

I promised to update everyone and let you know how to buy a plane. So here is the low down. I am not taking any additional orders as of this time. I currently am taking inventory of my planemaking material.

As you can imagine it is not good business to sell what you don't have. Or in other words it doesn't work out well for me or the buyer to sell a plane and then not have the wood to make it or it not be seasoned properly. I think most of you that read this blog appreciate how much effort it is to get quarter sawn beech. If you don't know then read this post here.

Coffin Smoother

What does this all mean? It means that if I have sold you a plane then I have confirmed that I do have the beech stock on hand to make those planes. Everyone else that would like to buy a plane will need to keep an eye on my blog. Over the coming months I will be releasing some planes as they become available.

Jack plane

Why not take orders on these? It comes down to my scheduling. One thing is I still have outstanding chair orders that I need to fulfill. I will in the future continue to produce Danish modern pieces as I have been along with my wooden planes, thought the furniture will be much less by way of comparison.

Miter plane

I think there is something positive about this approach. It means that I will be more efficient at producing planes since I can work with the stock I have ready. Plus I can take advantage of some unique material, like pear and apple wood, that I have seasoning at the moment that otherwise, in a practical way, I wouldn't be able to take orders on because of the limited stock.

Panel Raiser

I will also be focusing on making sizes and styles of moulding planes that are suited for furniture making. These generally are the smaller sizes or profiles specific to furniture. These are the ones that are hardest to find on the antiques market since it is dominated by architectural moulding planes, etc.

Rabbet plane

Another positive thing is that I won't have a super long back order that you will have to sign up for if you want a plane. Everyone will be on an even playing field and when things come up for sale it will be announced and then first come first serve. If you miss out then you will be first up for the next batch if you tried for the previous one. I will explain more when that time comes.

Hollow and Round Pair

I am trying to keep this simple as I will have quite a varied schedule over the coming year. I realize things will evolve as I develop this aspect of my craft and try to accommodate the increased interest in the growing handwork craft movement.

I will have a few more announcements in the coming months that I currently have in the works for those of you that want to make planes yourself.

Stay tuned for updates and thanks for your patience. I will get back to my regular blog posts soon.

Wednesday, November 27, 2013

Free Cyma Recta / Ogee Profile Moulding Plane Plans

Here is some plans I have had setting on the shelf and I finally got around to cleaning them up well enough to throw out here on the blog. Hope you like them.

This is a complex profile moulding plane featuring a 7/8" ogee profile just like I showed off in a prior post. It is a side escapement plane and is a very functional size. A 5/8" size is quite useful as well for general work. This should give you an idea of how to produce the other sizes if you follow the same principals of layout.


I highly recommend forming the profile of the sole before doing any of the other layout and cutting. It makes sure that the mouth is located at exactly the right spot. If you do it at the end then you may remove too much material getting the profile shape just right and then have a very wide mouth.

By the way I always cut the profile on a complex profile plane first whether it is a moulding plane or bench plane such as the raised panel bench plane. This is the opposite advice I recently saw in the article for the raised panel plane from Popular Woodworking. Try it both ways and you will see it results in a much better plane cutting the profile first.

CLICK HERE TO GO TO THE DOWNLOAD PAGE. (Click on the download button in the upper right corner of the new page to begin download.) These are offered as a free download intended for non commercial / personal use only. These are copyright protected. 

If I made any errors anywhere in the plans please let me know so I can update them.

Enjoy!


Sunday, November 17, 2013

How to Make the Mouth, Abutment & Wedge For A Wooden Bench Plane

The hardest part of a wooden bench plane to wrap your head around is with out a doubt also the soul and heart of the very plane itself. It is where all the good stuff happens. It is the parts you can't see but that matters the most.


No online picture of an antique bench plane would ever give you the details that you need to make the critical functioning parts. You would be too timid to probably dissemble one if you were to even happen upon the exact one you wanted to duplicate while at flee market or vintage tool shop.

Well no need to now. Even though this post won't go into step by step how to form all the critical parts at least you will see what they are supposed to look like which is half the battle, or more.

While in the process of making a demo plane for a post to show the inter workings (and I had actually already cut it in half in order to show off the inter workings) Doug Moulder came along and drew up my jack plane plans in a 3D model. Great work Doug! So there is a nice plane cut in two parts if anyone wants one. I may or may not get around to photo graphing it to show how the inter workings come together. Funny thing is that after all that I realized that I could have just cut the parts into the side of a block of wood without doing it the hard way and then cutting it in half. Sometimes I wonder...

Anyhow here is the good stuff you have been waiting for. Enjoy!


Also I have a real interesting project in the works. Tapered plane blades. More on that to come!


Thursday, October 31, 2013

Free Wooden Jack Plane Plans - 18th Century Style

So in my continuing effort to confound people as to how I make my living giving everything I know away in my spare time here is more plans to print and hopefully make something with. (Download link is at bottom of page)

Wooden Jack Plane Plans Image
I think this plane is just about my favorite. It is fun to just hog away at rough stock with this guy. Give it a heavy cambered blade and just see the shavings fly. If I could get someone to hold the camera for me I would demo this one in action but I am sure you can imagine.

The great thing about a wooden jack plane is that the sole doesn't have to be ultra flat to work really well. And this is probably the best wooden plane to start with because it is much easier to do a lot of physical rough work with this lighter plane than with a metal one. Once you use it you will understand what I mean.

Also cutting the mouth for a jack is easier since you would typically want it quite open. Cutting the mouth on a smoothing plane on the other hand requires a very tight opening and thus much more precision both for creating the mouth and floating the blade bed to keep the mouth narrow.

I hope to follow up with a cut away view of the inner workings of the mouth. Either a good drawing or an actual one made in wood with several pictures. Don't hold me to the fire on this one as for timing. I will get there eventually. :)

Take care all!

CLICK HERE TO GO TO THE DOWNLOAD PAGE. (Click on the download button in the upper right corner of the new page to begin download.) These are offered as a free download intended for non commercial / personal use only. These are copyright protected. 

NOTE: The plans are in PDF format. If you don't have a PDF reader Adobe Acrobat is a free software that will make it viewable and printable. 

You do not have to print these to scale but if you do the first page is sized for 11" x 17" paper. The second one is 8-1/2" x 11". Keep this in mind if you go to the print store. Check the print by measuring the 1" square scale. Do this at the print shop because they often mess up.

If I made any errors anywhere in the plans please let me know so I can update them.

Tuesday, October 22, 2013

8 Things To Like About A Wooden Bench Plane

No. 1.  They are light and quick. But you say "You need that mass.". Bologna (no offense bologna I like you).  What goes forward must come back. That reminds me, my back feels a lot better using a wooden bench plane. I find I almost rock back and forth now instead of lunge and drag it back. I mean lift it not drag it. You will create a wear bevel on that back edge and mess up your clearance angle if you aren't careful. Now do you want that weight? I am guessing if you want more weight behind your plane then have some more desert.

No. 2.  A blade that never shifts in use. I heard this surprise reaction over and over this last week at Woodworking In America while people tried out the wooden bench planes. I thought I was the only one that had this issue with the metal planes. I just really cranked down the lever cap to keep it in place and then it was so tight that the lateral blade adjustment lever was hard to make fine adjustments. I end up using a hammer for fine adjustments just like on a wooden plane.

No. 3.  Fast blade removal and no cap iron to remove/reinstall for sharpening. This equals back to work faster coming and going. That takes me to no. 4.

No. 4.  Never fearing I will strike my perfectly sharpened blade on the metal mouth while reinstalling the blade. I know I am not the only person that this pains.

No. 5.  The ultimate feedback due to a solid connection the handle has to the body. Unlike a metal plane that has a bolted on handle that shifts in use, loosens because of use and, slight moisture changes a wooden plane telegraphs every subtle surface interaction with the cutting edge back to your hand. No need to see tear out, you know it when you feel it and intuitively begin to adjust your planing like the blind reading braille. Beautiful really.

No. 6.  Never worrying about if you remembered to rub your plane down with oil so that it doesn't rust between uses.

No. 7.  A lighter tool chest. Multiply that by every other wooden plane you have. Is your back feeling even better?

No. 8.  Your Roubo bench no longer calls you a hypocrite. :) Ok that is funny admit it.

No offense to metal planes or there users. I have plenty of metal planes and they definitely find use in my shop. I have to say that wooden planes are hands down just more enjoyable to use. To me anyway.

Monday, October 14, 2013

How to Drill the Mortise on a Moulding / Molding Plane

UPDATE: SEE MY NEW METHOD HERE!

That title should probably be "What to use to drill a mortise on a moulding plane" but the "how to" must start out with the right tool. The wide mortises are easy. There are several different options to choose from in a typical shop but what about those really narrow mortises. Like the number one to four sizes. Basically anything 3/16" and under.

I have done the gimlet bit thing. They are great if you can first of all find the narrow ones and they are not all beat up and crooked and dull. That is difficult to find and I never found a narrow one that cut correctly as is. If you do find them they have many times been attempted to be cleaned up to make look nice for sale on eBay and thus dulled even further or someone tried to sharpen them and might as well have ruined it. I wish they were easy to sharpen but it is about as hard to sharpen as is sharpening a spoon bit. Once they are messed with too much in the wrong way then it is a nightmare to get them back to right. Well, at least it is for me.

So now that I have scared you off from trying to drill your mortise with a gimlet (sorry) let me tell you what I use.


I stumbled upon these little auger bits made in Japan by Star-M. They are a real jewel. Unlike a gimlet bit you don't have to constantly remove them from the hole to clear the shavings expect right near the very end. They cut through at the bottom cleanly. Once you get them tracking straight they will keep on that path. That is a plus but also a downside where as the gimlet lets you steer them if you need to correct your path. But on the other hand that is the downside to a gimlet. You have to constantly keep them on course. They tend to drift if left to their own. They also will over heat easily and dull or even suddenly break off in the mortise which has happened to me. Ouch!


Ok so where to buy these little guys. I bought mine from a supplier in Germany. www.fine-tools.com. They are reasonably price but the shipping is costly, as you would expect. They sell a small bit brace that fits the hex shanked bits that I use. It is decent but I am going to make one eventually that is more suited to me. Of course you can use your standard two jaw brace and use an adapter or these bits can be used in a power drill, according to the manufacturer. I have not tried this myself.

I use the 3mm for the smallest wedges, the 4mm and 5mm for most everything else. If I had to suggest one it would be the 4mm since it tends to be one that I use the most.

Hope that helps you out in making those narrow mortises!

Friday, October 11, 2013

New Plane Stamp by Blacksmith Peter Ross

If you have been keeping up with the blog then you may have noticed that I don't stamp the toe of my planes. I have had a custom stamp for my furniture for a long time but my planes have gone nameless. I wanted something that was authentic to stamp my planes. Now I have it!


I asked Peter Ross if he would be willing to make me a plane stamp just like blacksmiths made for planemakers a couple hundred years ago. If you aren't familiar with Peter Ross then you may remember him from Roy Underhill's show The Woodwright's Shop. He is a regular and makes historical tools the way they were made originally.


I am so glad he agreed to make me one. I am so pleased with the results of my stamp. It is better than I could have hoped for. Just look at the results. I think this has added a true authentic feel that matches all the work I try to impart into the planes I make.


 Jack plane


Smoother and Jointer. Right is freshly oiled while the left is an older plane. Both beech of course.

Now, I am ready for Woodworking in America. See you there!

Monday, October 7, 2013

Cyma Recta / Reversa Ogee Moulding Plane Demonstration

Here is another complex profile moulding plane that I wanted to share. It really is fun to use. I just love making a new plane like this.


This plane is aimed at making primarily a cyma recta profile. That is the ends of the "S" of the profile are horizontal while a cyma reversa has the ends of the "S" being vertical. Just think reVersa for vertical. This plane can make the cyma reversa profile if you stand the board vertically while working the edge. You just have to stop it at the right depth on your own rather than using the depth stop.


Here is a video of it in action. Enjoy!


Thursday, October 3, 2013

Fun With Raised Door Panel Planes At Woodworking In America

So I am gearing up to be at the Woodworking In America Show in a couple of weeks. It has been a funny back and forth game. Am I going, am I not? I rented a booth about six months ago and then canceled it when I realized with all the work I had on my plate there was no way I would have time to prepare what I wanted to present, which was planes.

Well wouldn't you know it, Peter Galbert calls me and has space in his double booth for me if I want to use it. OK, I say, I will go if you twist my arm. If he only knew I was secretly planning on showing up, be a party crasher, and hang out in his booth uninvited. I knew he would be too embarrassed to tell me to go home. OK, maybe that is not true, but I obviously have wanted to go this year and looks like I will.

So I won't have all the planes ready that I want to show off. In fact, I will probably only have two sets of planes for sale since I am so ill prepared but if you have wanted to try out some traditional 18th century style planes then here is your chance. I will have some moulding planes (hollows, rounds, custom profiles) and bench planes on hand.


With that said I wanted to show off a plane for making raised door panels. It features a skewed blade for making really smooth cross grain cuts without splintering. I was inspired to make this plane after seeing it in use on The Woodwright's Shop with Roy Underhill episode 3209 of the 2012-13 season. Go to the 21:30 minute mark and you will see his in use. I think he says this is circa 1830 plane that he is using.


On the fly, I threw together two videos of the plane making the long grain and the cross grain cuts. I didn't plan this video so, as you can see, I didn't make the cross grain cuts first as you actually do in making a real door panel but this gives you an idea of how it looks in action. I am cutting this in walnut so you can imagine how nice this will cut everything else. Hope you like them!


Long grain cut.


Cross grain cut.


Wednesday, September 4, 2013

Make A Pair Of Wooden Side Round Planes

That title is intended to be an imperative. What? Never mind, just make a pair and you will begin to see your moulding designs really open up and take new shape, literally.

I have found myself using these in many other places than what they were, I am sure, originally intended for. I won't spoil it for you. Do some exploring. For my own personal use I would choose a pair of these over a pair of snipe's bill planes, if I had to make a choice.

I have had a few inquires about these planes and rather than answer the same questions over again I decided I should get my tail in gear and pump out these for everyone.


These plans show a single right hand version of a 1/2" radius side round. Just mirror the drawings for the left hand plane. There is a view of the left side and the right side of the same plane so that the escapement and shoulder details are more easily understood as to there location. So don't be confused. I split up some of the toe views so as not to over crowd the details and for clarity. When I have some time I will actually put up some photos of the details, as well.

Along those lines, I have pictured (in the past on this blog) some side rounds that I place the escapement on the opposite side to what is shown in these plans. They both work but as you can see in the plans I do it differently now. It makes everything line up better in the layout and is also a bit more practical for shaving ejection.

If you want to post these anywhere else online please link back to this page/ post. I offer these as a free download but they are not intended for commercial use. Again please limit the use of this design to your personal use and please don't be silly and try to sell them on Ebay. It is FREE! and it is © copy right protected.

CLICK HERE TO GO TO THE DOWNLOAD PAGE. (Click on the download button in the upper right corner of the new page to begin download.)

NOTE: The plans are in PDF format. If you don't have a PDF reader Adobe Acrobat is a free software that will make it viewable and printable. 

You do not have to print these to scale but if you do the plans are sized for 17" x 22" paper. Keep this in mind if you go to the print store. Check the print by measuring the 1" square scale. Do this at the print shop because they often mess up.

If I made any errors anywhere in the plans please let me know so I can update them.

Friday, August 2, 2013

Beech Wood for Planemaking - UPDATE!

UPDATE: In addition to the supplier below try Rare Woods USA. The owner is Rory though anyone one can help you that answers the phone. He is from South Africa and began importing exotic lumber to the US about five years ago. He is not new to the business since he worked with exotic lumber in South Africa for about 25+ years. I learned of his exceptional stock of woods from Tim Manney. Thanks Tim! He spoke well of Rory and after speaking to him myself I got the same vibe. He really knows his wood and very quickly understood what I was inquiring about. He does have a minimum order so please be aware of that. Currently it is $300+ shipping. This accounts for his valuable time in selecting the right boards that you may want. He also has quarter sawn European steamed beech for plane making up to 8/4. I encourage you to check out his video about his lumber on his home page. You will see what a unique place he has. If you buy from him please let me and others know your experience by posting in the comments below. I have not purchased anything from him but wanted to pass on the source.

Have you ever heard of over promising and under delivering. Guilty as charged.

Several months ago I offered to sell beech blanks for those that have been looking for some to make moulding planes. I unfortunately have yet to deliver on that offer. I have a number of readers that I presume are still waiting on me. Sorry!

Well thanks to Doug Moulder (a blog reader) I have an out. He found a good supplier in Ohio. The beech supplier regularly (according to him) supplies makers such as Matt Bickford with their plane stock. I wanted to pass on his information to those that are in need. I can't vouch for any of his material but he does have 100% positive feedback on eBay since 1998 and Doug Moulder made some nice planes from his stock.

Mike is his name and his number is 740-310-3984. He goes by user name Logbuyer on eBay. If you have used his wood and made planes from it please feel free to leave your feedback in the comments section below.

I really hope this helps anyone that is trying to get some wood to make a few planes. By the way his current prices are better than I would have been able to offer.

Happy making!

Thursday, August 1, 2013

The Coffin Shaped Smoother- Up Close- Part 2

I don't know about you but videos are excellent to get the feel of something but to study something you want to make, pictures are it. 

I tried to include a few angles that showed off some of the different parts, both assembled and disassembled. I threw in a few artsy shots, I can't help myself.


Notice the iron is only heat treated at the end. I never bother trying to do the whole thing. It would take you a very long time to work past this end part in use, anyway. Japanese blades are usually laminated with steel, good for cutting blades, only at the end. So there you have it. I don't know what other planemakers do.


The secret to that curving chamfer down the side is to use a drawknife. No planing down a curve here. Spoke shave would work too but I like to go right at it. Plus I already have the drawknife out for making the coffin shape and rounding the heel. Thats right, no band sawing on these parts. I want to be dead on and I would have to clean up the bandsaw marks with something anyway. Probably the chairmaker in me. The drawknife is always in the hand.


Seeing into the mouth should help demystify that part a little.


Make your vertical chamfers with a chisel and #5 sweep gouge.

If you noticed the growth rings, I broke the rule here of putting the bark side of the wood to the sole. I don't hold to that religiously. If the pith side has a flatter growth ring shape then I will use that side. The more parallel the rays are to each other the less change in shape that area will experience. 

Maybe I will post sometime about how beech grows to explain why that happens. I also have other theories as to why for practical reasons the bark side was usually used. Thats for another time.


Here is a little perspective in use.

I can't remember the last time I wanting to make something this much, just so I can use my new tool. Ok, I will stop blabbing. 

Have fun in the shop!


Wednesday, July 31, 2013

The Coffin Shaped Smoother- Up Close

Have you tried making that smoother from the plans that I posted up recently? Need a little help or a closer look? Well, here it is.

I put together two videos to show its details and how it performs in that order below.


I really love this little smoothing plane. I hope you make one. It will become a go to plane as it has for me.

I will eventually offer these for sale as well if you don't have the time or the desire to make one yourself. I understand that making a tool is not everyones interest but the using of it is. Let me know if you want more information.

Enjoy!

Friday, May 24, 2013

Ahh... The Perfect Summer Day On Repeat

So, I have finally got my first batch of beech plane blanks out of the kiln. I have dried steambent wood parts in my small light bulb kiln for chairmaking for quite some time now. That is a whole different process really than when drying wood blanks to make wooden plane bodies.


What is my aim when drying wood for plane blanks? Well, with a background in working greenwood I always have appreciated how wood works that has been air dried. It is just different. I don't want to over rate it but the way the tools cut it is just different. As you can imagine I prefer it to the super dried stuff.


The difference lies in the fact that air dried wood never gets to a high temp like typical kiln dried wood. In the kiln the temp will generally get to the 160˚ range for many woods and some are higher. This is often done just to be safe and kill bugs or to set pitch in resinous woods like pine and to get the wood dried to a very low moisture content. However, it isn't actually necessary to heat wood this hot to dry it.

It is important to appreciate that commercial kiln operators are concerned with speed since this affects profits. Not knocking this, they are businesses, after all. However, the resulting product is not as good as it could be for the artisan woodworker. I have been completely sickened at times to have bought a wood like white oak that was beautiful wide boards and paid premium prices to only find that 30-40% was a waste because of drying defects hidden within the wood.

Anyway, these sorts of things, among the fact that I couldn't find certain wood cut and dried in the orientation or sizes that I wanted, lead me into the kiln drying business. ...for myself of course.

So I started researching this about a year ago and decided to go with a low temp dehumidification kiln. It basically allows me to control the environment in a closed chamber. Imagine wood drying on a perfect summer day at the optimal range of temperature and humidity for that wood. Now recreate that day over and over until that wood is dry. That is what this kind of kiln allows me to do. The blanks I am drying never get over 105˚ or below an average moisture content (MC) of 10 percent.

Yes this can take longer than a high temp (HT) commercial kiln but not very much longer. For most hardwoods it can be dried just as fast. In fact since I am not super drying the wood to, say, 6-8% MC (because these will be used in a open shop environment) then I don't have to dry as long. An advantage is that a low temp dehumidification kiln uses way less power than conventional kilns. Mine can run 100% of the time for 30 days for around $53. Of course, high tech kilns like this are not cheap to begin with. Think hybrid electric cars, you pay up front to get low operating cost.

I think this is the best of both worlds. After all there are drawbacks to air drying lumber. Air drying can take several years, first off. It is also subject to a lot of drying defects in actuality since you can't control the weather, as we all know. Surface checks are very common in air dried wood and then there are woods that are very susceptible to stain from mold and fungus if not dried quickly enough or cut in the "wrong" season. Beech is one of the worst for both surface checks and fungus stain when air dried.

Here are a few pictures from the process. I wish I had some of the log getting cut up a Curtis' place. Thanks again Curtis for letting me use your yard!


Haul it...


...cut it...


...stack it...


...load it...


...check it...


...start making it...


...finish making it...


...use it... (nice hair!)


...stack it... Wait, didn't I already say that?


Saturday, April 27, 2013

Free Wooden Smoothing Plane Plans

So here we go again. It looks like you folks are having fun making some wooden planes so lets add to the fun. Here is a great little coffin shaped smoother for your collection. This is a fantastic size and a great introduction to making a wooden bench plane. The construction of the parts is a very typical arrangement and the size of wood needed to make this is much easier to find.

Here are the plans in several different layouts. The download has four pages. First one is for shop reference with measurements and lays out everything logically but not intended to be to scale. The second is for printing to scale all on one page but is on a large standard size paper of 11" x 17". The last two pages are for printing to scale on your home printer paper of 8-1/2" x 11".


As with other free plans I offer, I have one request and that is if you want to post these anywhere else online please link back to this page/ post. I offer these as a free download but they are not intended for commercial use. Again please limit the use of this design to your personal use and please don't be silly and try to sell them on Ebay. It is FREE! and it is © copy right protected.

CLICK HERE TO GO TO THE DOWNLOAD PAGE. (Click on the download button in the upper right corner of the new page to begin download.)

NOTE: The plans are in PDF format. If you don't have a PDF reader Adobe Acrobat is a free software that will make it viewable and printable. Make sure where ever you print it that the "scale" is set to 100% or the measurements won't be accurate on the print. You may need to unselect "fit to page" when printing.

If I made any errors anywhere in the plans please let me know so I can update them.

UPDATE: See videos of this plane for an unclose look here.