Showing posts with label 18th century. Show all posts

Friday, December 13, 2013

Tapered Bench Plane Blades Production Progress

So I have the blades back after machining and they look great. I just need to get these heat treated now. The larger ones are a bit too big to heat treat like I currently do my moulding plane blades which I do myself in-house. I want these to be heat treated without having to do a lot of flattening afterwards. 

I have a stamp designed for marking the blades. That will take some time to get but look forward to having that to complete the look. 

I stuck a blade in my trusty smoother that never leaves my bench top just to see how it will look. It looks great to me. What do you think?

Smoother with new blade

I am busy working away trying to get other things lined up for the Hand Tool Event in Charleston with Lie-Nielsen on March 28-29th. Also my website has been down for about a year now as I rework it. It is time to get that finished and back up and running. 

This computer keeps demanding my attention when all I want to do is be working in the shop. Back to normal soon enough.


Wednesday, November 27, 2013

Free Cyma Recta / Ogee Profile Moulding Plane Plans

Here is some plans I have had setting on the shelf and I finally got around to cleaning them up well enough to throw out here on the blog. Hope you like them.

This is a complex profile moulding plane featuring a 7/8" ogee profile just like I showed off in a prior post. It is a side escapement plane and is a very functional size. A 5/8" size is quite useful as well for general work. This should give you an idea of how to produce the other sizes if you follow the same principals of layout.


I highly recommend forming the profile of the sole before doing any of the other layout and cutting. It makes sure that the mouth is located at exactly the right spot. If you do it at the end then you may remove too much material getting the profile shape just right and then have a very wide mouth.

By the way I always cut the profile on a complex profile plane first whether it is a moulding plane or bench plane such as the raised panel bench plane. This is the opposite advice I recently saw in the article for the raised panel plane from Popular Woodworking. Try it both ways and you will see it results in a much better plane cutting the profile first.

CLICK HERE TO GO TO THE DOWNLOAD PAGE. (Click on the download button in the upper right corner of the new page to begin download.) These are offered as a free download intended for non commercial / personal use only. These are copyright protected. 

If I made any errors anywhere in the plans please let me know so I can update them.

Enjoy!


Thursday, November 21, 2013

Tapered Bench Plane Blades for Traditional Wooden Planes

UPDATE:
Am I the last person to know about this? Lee Valley sells tapered plane blades! Check them out here. Ok so they are shorter than my bench plane blades. That is my only complaint. I really don't know where my head has been stuck. Does anyone know how long these have been for sale? I am currently slapping my forehead and doing back flips all at the same time. All I can do is laugh. Thanks to everyone who has emailed to inform me about these. :)

Original post:
So I have been working on getting some tapered wooden bench plane blades made. You may or may not be familiar with what I am talking about. If you have used a side escapement moulding plane then you are familiar with the tapered blades they have. Well this is no different really.

All the planes I have made up to this point are single iron planes, that is the plane blades have no cap iron, and I have made them with just a flat iron, without any taper. I know that you can make a very good plane with a flat iron but there are some things that are far better with a tapered iron.

Here is just a couple of reasons. One is that the blade is wedged more securely thus vertically eliminating the blade shifting while in use either side to side or backwards. This more secure fit really reduces and chatter that could result from less than ideal fit from normal seasonal wood movement. 

The biggest advantage I believe is that when the back of the blade is maintained flat during sharpening a taper toward the heel of the blade keeps the blade form actually becoming a taper toward the cutting edge on a flat blade since it is being reduced in thickness on that end.  This would of course result in a blade that shifts backwards in use and becoming loose. Along with that issues is that a flat blade seems to change position more when setting the wedge while a tapered one doesn’t. This seems contrary to what you might imagine. I could go on but I think you are probably seeing the value of a tapered blade so far.

While researching how to machine these blades and just before I was about to go on a buying spree for more tools (metal working stuff; milling machine, surface grinder, etc.) I met a retired machinist in his eighties that convinced me to let him produce them for me. I think I am glad that I agreed if not for the very fact I know they will be right the first time and that I can get the blades I want in a reasonable amount of time and on to making the planes I want to make. After all I am a woodworker first, the metal work is something I would like to learn but I need to stay focused as much as I can. After all the original blades for these antique 18th century planes would have been blacksmith made.


Speaking of that, I am basing the blades on the single iron plane blades that are shown in "The Tool Chest of Benjamin Seaton" 2nd Edition. They are from a british plane found in a tool chest from 1797. Thank you to blacksmith Peter Ross for getting me to the proper historically accurate blade design.

I want to thank Raney Nelson of Daedtoolworks for getting me on the right track for getting these machined in the correct fashion. That is to say the right machines and the right tooling.

Here are a few photos of the process and the results so far in our test material. I hope to have the actual blades cut, shaped and in my hands next week! Then they will be off for heat treating.


Stay tuned!

Sunday, November 17, 2013

How to Make the Mouth, Abutment & Wedge For A Wooden Bench Plane

The hardest part of a wooden bench plane to wrap your head around is with out a doubt also the soul and heart of the very plane itself. It is where all the good stuff happens. It is the parts you can't see but that matters the most.


No online picture of an antique bench plane would ever give you the details that you need to make the critical functioning parts. You would be too timid to probably dissemble one if you were to even happen upon the exact one you wanted to duplicate while at flee market or vintage tool shop.

Well no need to now. Even though this post won't go into step by step how to form all the critical parts at least you will see what they are supposed to look like which is half the battle, or more.

While in the process of making a demo plane for a post to show the inter workings (and I had actually already cut it in half in order to show off the inter workings) Doug Moulder came along and drew up my jack plane plans in a 3D model. Great work Doug! So there is a nice plane cut in two parts if anyone wants one. I may or may not get around to photo graphing it to show how the inter workings come together. Funny thing is that after all that I realized that I could have just cut the parts into the side of a block of wood without doing it the hard way and then cutting it in half. Sometimes I wonder...

Anyhow here is the good stuff you have been waiting for. Enjoy!


Also I have a real interesting project in the works. Tapered plane blades. More on that to come!


Thursday, October 31, 2013

Free Wooden Jack Plane Plans - 18th Century Style

So in my continuing effort to confound people as to how I make my living giving everything I know away in my spare time here is more plans to print and hopefully make something with. (Download link is at bottom of page)

Wooden Jack Plane Plans Image
I think this plane is just about my favorite. It is fun to just hog away at rough stock with this guy. Give it a heavy cambered blade and just see the shavings fly. If I could get someone to hold the camera for me I would demo this one in action but I am sure you can imagine.

The great thing about a wooden jack plane is that the sole doesn't have to be ultra flat to work really well. And this is probably the best wooden plane to start with because it is much easier to do a lot of physical rough work with this lighter plane than with a metal one. Once you use it you will understand what I mean.

Also cutting the mouth for a jack is easier since you would typically want it quite open. Cutting the mouth on a smoothing plane on the other hand requires a very tight opening and thus much more precision both for creating the mouth and floating the blade bed to keep the mouth narrow.

I hope to follow up with a cut away view of the inner workings of the mouth. Either a good drawing or an actual one made in wood with several pictures. Don't hold me to the fire on this one as for timing. I will get there eventually. :)

Take care all!

CLICK HERE TO GO TO THE DOWNLOAD PAGE. (Click on the download button in the upper right corner of the new page to begin download.) These are offered as a free download intended for non commercial / personal use only. These are copyright protected

NOTE: The plans are in PDF format. If you don't have a PDF reader Adobe Acrobat is a free software that will make it viewable and printable. 

You do not have to print these to scale but if you do the first page is sized for 11" x 17" paper. The second one is 8-1/2" x 11". Keep this in mind if you go to the print store. Check the print by measuring the 1" square scale. Do this at the print shop because they often mess up.

If I made any errors anywhere in the plans please let me know so I can update them.

Tuesday, October 22, 2013

8 Things To Like About A Wooden Bench Plane

No. 1.  They are light and quick. But you say "You need that mass.". Bologna (no offense bologna I like you).  What goes forward must come back. That reminds me, my back feels a lot better using a wooden bench plane. I find I almost rock back and forth now instead of lunge and drag it back. I mean lift it not drag it. You will create a wear bevel on that back edge and mess up your clearance angle if you aren't careful. Now do you want that weight? I am guessing if you want more weight behind your plane then have some more desert.

No. 2.  A blade that never shifts in use. I heard this surprise reaction over and over this last week at Woodworking In America while people tried out the wooden bench planes. I thought I was the only one that had this issue with the metal planes. I just really cranked down the lever cap to keep it in place and then it was so tight that the lateral blade adjustment lever was hard to make fine adjustments. I end up using a hammer for fine adjustments just like on a wooden plane.

No. 3.  Fast blade removal and no cap iron to remove/reinstall for sharpening. This equals back to work faster coming and going. That takes me to no. 4.

No. 4.  Never fearing I will strike my perfectly sharpened blade on the metal mouth while reinstalling the blade. I know I am not the only person that this pains.

No. 5.  The ultimate feedback due to a solid connection the handle has to the body. Unlike a metal plane that has a bolted on handle that shifts in use, loosens because of use and, slight moisture changes a wooden plane telegraphs every subtle surface interaction with the cutting edge back to your hand. No need to see tear out, you know it when you feel it and intuitively begin to adjust your planing like the blind reading braille. Beautiful really.

No. 6.  Never worrying about if you remembered to rub your plane down with oil so that it doesn't rust between uses.

No. 7.  A lighter tool chest. Multiply that by every other wooden plane you have. Is your back feeling even better?

No. 8.  Your Roubo bench no longer calls you a hypocrite. :) Ok that is funny admit it.

No offense to metal planes or there users. I have plenty of metal planes and they definitely find use in my shop. I have to say that wooden planes are hands down just more enjoyable to use. To me anyway.

Friday, October 11, 2013

New Plane Stamp by Blacksmith Peter Ross

If you have been keeping up with the blog then you may have noticed that I don't stamp the toe of my planes. I have had a custom stamp for my furniture for a long time but my planes have gone nameless. I wanted something that was authentic to stamp my planes. Now I have it!


I asked Peter Ross if he would be willing to make me a plane stamp just like blacksmiths made for planemakers a couple hundred years ago. If you aren't familiar with Peter Ross then you may remember him from Roy Underhill's show The Woodwright's Shop. He is a regular and makes historical tools the way they were made originally.


I am so glad he agreed to make me one. I am so pleased with the results of my stamp. It is better than I could have hoped for. Just look at the results. I think this has added a true authentic feel that matches all the work I try to impart into the planes I make.


 Jack plane


Smoother and Jointer. Right is freshly oiled while the left is an older plane. Both beech of course.

Now, I am ready for Woodworking in America. See you there!

Thursday, October 3, 2013

Fun With Raised Door Panel Planes At Woodworking In America

So I am gearing up to be at the Woodworking In America Show in a couple of weeks. It has been a funny back and forth game. Am I going, am I not? I rented a booth about six months ago and then canceled it when I realized with all the work I had on my plate there was no way I would have time to prepare what I wanted to present, which was planes.

Well wouldn't you know it, Peter Galbert calls me and has space in his double booth for me if I want to use it. OK, I say, I will go if you twist my arm. If he only knew I was secretly planning on showing up, be a party crasher, and hang out in his booth uninvited. I knew he would be too embarrassed to tell me to go home. OK, maybe that is not true, but I obviously have wanted to go this year and looks like I will.

So I won't have all the planes ready that I want to show off. In fact, I will probably only have two sets of planes for sale since I am so ill prepared but if you have wanted to try out some traditional 18th century style planes then here is your chance. I will have some moulding planes (hollows, rounds, custom profiles) and bench planes on hand.


With that said I wanted to show off a plane for making raised door panels. It features a skewed blade for making really smooth cross grain cuts without splintering. I was inspired to make this plane after seeing it in use on The Woodwright's Shop with Roy Underhill episode 3209 of the 2012-13 season. Go to the 21:30 minute mark and you will see his in use. I think he says this is circa 1830 plane that he is using.


On the fly, I threw together two videos of the plane making the long grain and the cross grain cuts. I didn't plan this video so, as you can see, I didn't make the cross grain cuts first as you actually do in making a real door panel but this gives you an idea of how it looks in action. I am cutting this in walnut so you can imagine how nice this will cut everything else. Hope you like them!


Long grain cut.


Cross grain cut.


Wednesday, September 4, 2013

Make A Pair Of Wooden Side Round Planes

That title is intended to be an imperative. What? Never mind, just make a pair and you will begin to see your moulding designs really open up and take new shape, literally.

I have found myself using these in many other places than what they were, I am sure, originally intended for. I won't spoil it for you. Do some exploring. For my own personal use I would choose a pair of these over a pair of snipe's bill planes, if I had to make a choice.

I have had a few inquires about these planes and rather than answer the same questions over again I decided I should get my tail in gear and pump out these for everyone.


These plans show a single right hand version of a 1/2" radius side round. Just mirror the drawings for the left hand plane. There is a view of the left side and the right side of the same plane so that the escapement and shoulder details are more easily understood as to there location. So don't be confused. I split up some of the toe views so as not to over crowd the details and for clarity. When I have some time I will actually put up some photos of the details, as well.

Along those lines, I have pictured (in the past on this blog) some side rounds that I place the escapement on the opposite side to what is shown in these plans. They both work but as you can see in the plans I do it differently now. It makes everything line up better in the layout and is also a bit more practical for shaving ejection.

If you want to post these anywhere else online please link back to this page/ post. I offer these as a free download but they are not intended for commercial use. Again please limit the use of this design to your personal use and please don't be silly and try to sell them on Ebay. It is FREE! and it is © copy right protected.

CLICK HERE TO GO TO THE DOWNLOAD PAGE. (Click on the download button in the upper right corner of the new page to begin download.)

NOTE: The plans are in PDF format. If you don't have a PDF reader Adobe Acrobat is a free software that will make it viewable and printable. 

You do not have to print these to scale but if you do the plans are sized for 17" x 22" paper. Keep this in mind if you go to the print store. Check the print by measuring the 1" square scale. Do this at the print shop because they often mess up.

If I made any errors anywhere in the plans please let me know so I can update them.

Thursday, August 1, 2013

The Coffin Shaped Smoother- Up Close- Part 2

I don't know about you but videos are excellent to get the feel of something but to study something you want to make, pictures are it. 

I tried to include a few angles that showed off some of the different parts, both assembled and disassembled. I threw in a few artsy shots, I can't help myself.


Notice the iron is only heat treated at the end. I never bother trying to do the whole thing. It would take you a very long time to work past this end part in use, anyway. Japanese blades are usually laminated with steel, good for cutting blades, only at the end. So there you have it. I don't know what other planemakers do.


The secret to that curving chamfer down the side is to use a drawknife. No planing down a curve here. Spoke shave would work too but I like to go right at it. Plus I already have the drawknife out for making the coffin shape and rounding the heel. Thats right, no band sawing on these parts. I want to be dead on and I would have to clean up the bandsaw marks with something anyway. Probably the chairmaker in me. The drawknife is always in the hand.


Seeing into the mouth should help demystify that part a little.


Make your vertical chamfers with a chisel and #5 sweep gouge.

If you noticed the growth rings, I broke the rule here of putting the bark side of the wood to the sole. I don't hold to that religiously. If the pith side has a flatter growth ring shape then I will use that side. The more parallel the rays are to each other the less change in shape that area will experience. 

Maybe I will post sometime about how beech grows to explain why that happens. I also have other theories as to why for practical reasons the bark side was usually used. Thats for another time.


Here is a little perspective in use.

I can't remember the last time I wanting to make something this much, just so I can use my new tool. Ok, I will stop blabbing. 

Have fun in the shop!


Wednesday, July 31, 2013

The Coffin Shaped Smoother- Up Close

Have you tried making that smoother from the plans that I posted up recently? Need a little help or a closer look? Well, here it is.

I put together two videos to show its details and how it performs in that order below.


I really love this little smoothing plane. I hope you make one. It will become a go to plane as it has for me.

I will eventually offer these for sale as well if you don't have the time or the desire to make one yourself. I understand that making a tool is not everyones interest but the using of it is. Let me know if you want more information.

Enjoy!

Saturday, April 27, 2013

Free Wooden Smoothing Plane Plans

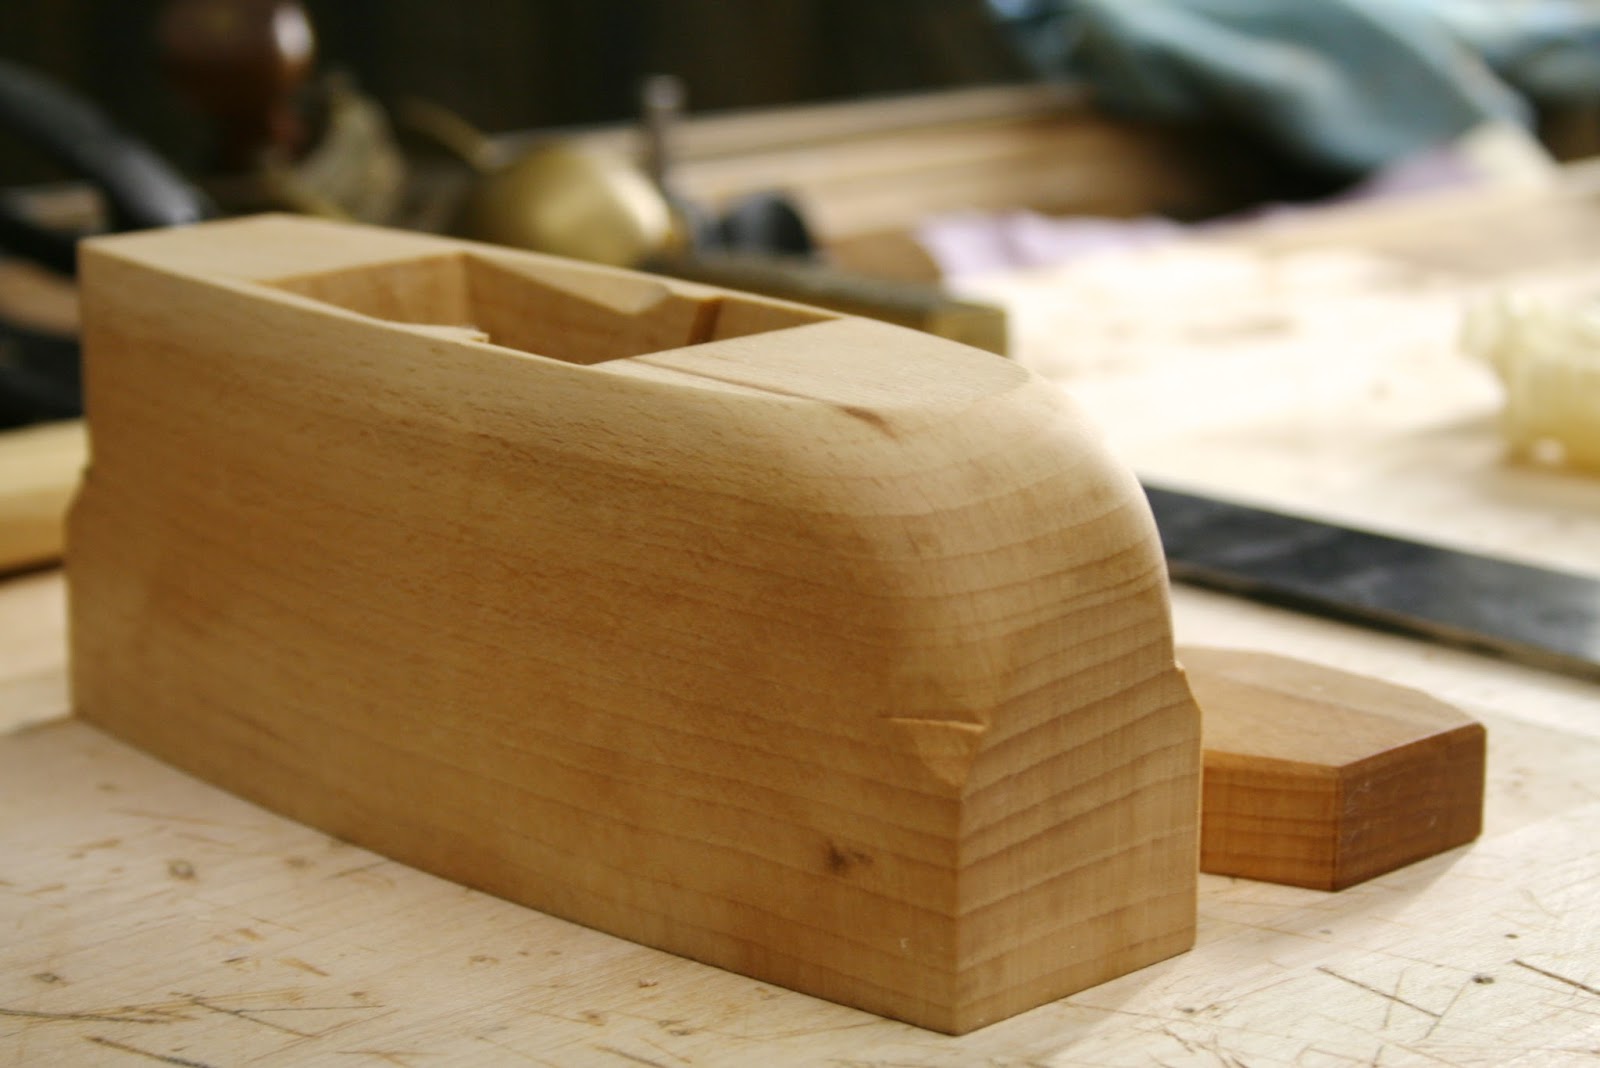
So here we go again. It looks like you folks are having fun making some wooden planes so lets add to the fun. Here is a great little coffin shaped smoother for your collection. This is a fantastic size and a great introduction to making a wooden bench plane. The construction of the parts is a very typical arrangement and the size of wood needed to make this is much easier to find.

Here are the plans in several different layouts. The download has four pages. First one is for shop reference with measurements and lays out everything logically but not intended to be to scale. The second is for printing to scale all on one page but is on a large standard size paper of 11" x 17". The last two pages are for printing to scale on your home printer paper of 8-1/2" x 11".


As with other free plans I offer, I have one request and that is if you want to post these anywhere else online please link back to this page/ post. I offer these as a free download but they are not intended for commercial use. Again please limit the use of this design to your personal use and please don't be silly and try to sell them on Ebay. It is FREE! and it is © copy right protected.

CLICK HERE TO GO TO THE DOWNLOAD PAGE. (Click on the download button in the upper right corner of the new page to begin download.)

NOTE: The plans are in PDF format. If you don't have a PDF reader Adobe Acrobat is a free software that will make it viewable and printable. Make sure where ever you print it that the "scale" is set to 100% or the measurements won't be accurate on the print. You may need to unselect "fit to page" when printing.

If I made any errors anywhere in the plans please let me know so I can update them.

UPDATE: See videos of this plane for an unclose look here.


Friday, March 22, 2013

Free Wooden Rabbet Plane Plans

So in the spirit of getting everyone in the shop and cutting up some wood I decided to post up a measured drawing of a 3/4" wooden rabbet plane in the 18th century style.

It is all wood with the exception of the blade which is easily gotten from Lie-Nielsen here. It features a conical escapement and some simple embellishments that a hand plane, chisel, and #7 sweep gouge can handle.

The plans are basic with a few things that can be easily changed if you like. Such as the bed angle is shown at 55˚, for hardwoods, but could be 45˚or 50˚or even 60˚. I show boxing on the plane but it is of course not a must especially if you are using a hard wood like beech in the first place but it will increase the life of the sole for a heavy user if you decide to add it. And of course you can increase or decrease the width.

I only have one request and that is if you want to post these anywhere else online please link back to this page/ post. I offer these as a free download but they are not intended for commercial use. Again please limit the use of this design to your personal use and please don't be silly and try to sell them on Ebay. It is FREE! and it is © copy right protected.


CLICK HERE TO GO TO THE DOWNLOAD PAGE. (Click on the download button in the upper right corner of the new page to begin download.)

Have fun ya'll!

NOTE: The plans are in PDF format. If you don't have a PDF reader Adobe Acrobat is a free software that will make it viewable and printable. The plans are 11"x17" and any print shop can print this or just print it in two pages on your home computer. Make sure where ever you print it that the "scale" is set to 100% or the measurements won't be accurate on the print.

If I made any errors anywhere in the plans please let me know so I can update them.


UPDATE: 3/25/13
Hey all, I for some reason I noted 1” where it should have been 3” on the drawing for the mouth location along the sole of the plane. The drawing is still correct but the stated length was a typo. I corrected it. The updated version has a title ending in 3/25/13.
That is what I get for editing my own work. Sorry. Download again if you are in doubt otherwise the error should be very obvious and the physical measurement otherwise is correct either way.

Wednesday, December 26, 2012

Moulding Planes - Where to Start

If you are going to put to use those garage sale finds the place to start is with a solid working rabbet plane. These will be used more than any other plane in your box. You will use them to do all your rebate and chamfer work unless you plan to use a table saw. One with a straight edge is what you want for work along the grain. Cross gain work usually is handled with a skewed version, thought not a must.

These are not just a wooden shoulder plane. A shoulder plane is expected to take a slicing cut on end grain and usually has a low angle. On the other hand a rabbet plane is designed to rapidly but smoothly cut side grain and thus will have a bed angle like a bench plane. A good rabbet plane will eject shavings out the escapement where as a shoulder plane will quickly clog since it was not designed to cut large amounts of side grain material. A good rabbet plane is a joy to use and a wooden one is light and quick.

To demonstrate I put a couple of videos together to show you how a properly set one will work. First, I I have a left hand side round that I use to set the gage line for my 3/4" rabbit to track in. I have the rabbet plane set moderately heavy. Watch the shavings really shoot out the escapement as I get going toward the end of the video


Now I show a full width shaving that is set on the lighter side for a 1-1/8" rabbet plane. A large rabbet plane like this is nice to have. I find I can keep my rebates level and plum much easier and track my gage line by using my fingers as a fence more easily as well.


These are planes that I made and will be part of what I will be continually offering as my range of moulding planes expand. For now I have these available in my Etsy shop

Good is the Answer

Do you ever have one of those mornings where you just look out and wonder... "What am I going to do today"? I am pondering that question. Somehow it seems to lead to my asking "What will this coming year bring". Good, bad, ugly...? I think, good. I believe good is the answer.

As a youth I would often ask myself that question. Not because it was the start of a new year but because I would find myself at a point of transition and know that things change and bring new experiences. Out of all the things that we can develop negative responses to, I have found that change and new have excited me, like an adventure. True, there has always been a since of hesitation but I think that is what makes it progress to excitement.

Why am I talking about all this? Well, it looks like I have a move in store. If all goes well I will be in Greenville, SC before I know it. I am very excited to be at the base of the Appalachian mountains with all of the best hardwoods in North American in my short reach. The area reminds me of where I grew up, Northern Arkansas.


I also have new plans for the year. I have for some time now wanted to make wooden planes in an 18th century style. I love how those plans function and are so simple in many ways yet reflect a hight of refinement that can be so appreciated. To think, they could make such objects of functionality from such basic materials is a marvel to me. I enjoy setting up and tuning a plane that I have made. So with that in mind I will be making those planes and selling them as I have the time and proper materials. Beech is so abundant in this country yet it is not commonly cut for commercial use and thus it is very difficult to acquire the cut of beech needed to make these planes properly. Now I have a good source already lined up and  hope to offer some beech made planes in the coming year.


If you like moulding planes then those will be a very large part of the offering and probably the first to be available. In fact I have been refining some of the proportions and stylings on those planes and are offering those for sale in my Etsy shop right now. Currently they are of walnut but this I feel is an good and acceptable alternative for a number of reasons but I will save that discussion for another post.

If you are interested and would like to hit me up about any particular planes or sets you have interest in I would be more than happy to put you on a list and get back to you as I have the materials to make these.


By the way my planes will reflect much of the research and design that Old Street tools or also know as Clark and Williams have done over the years. I have highly regarded their styles and input on the subject for some years now.